
Favorite Things Party

How to Throw a Favorite Things Party
If you love getting together with friends, discovering new must-have items, and leaving with some fun goodies, a Favorite Things Party is the perfect excuse to host a night in! Here’s how to plan one and make it a fun, stress-free experience for everyone. I’ve seen various ways and price points, but this is my personal favorite way to host a Favorite Things Party!
Rules for Your Guests
Set a Budget – I recommend keeping it around $20-$25 per item, but you can adjust based on what works for your group.
How Many to Bring – Each guest selects one favorite item within the set price range and brings three of that same item. You can also choose to have guests bring two instead—it’s flexible, but be clear on the invite.
Gifts Should Be Unwrapped – This makes it easier to see what’s available and speeds up the choosing process.
No White Elephant Style – No stealing! Unlike traditional gift swaps, everyone will get to pick their favorite new items instead of risking ending up with something they don’t want or already own.
Invitation Wording + Example

Make it clear what your guests need to bring! Here’s a simple invitation example:
🎉 Join Me for a Favorite Things Party! 🎉
Bring: 3 of the same item, priced around $25 each – something you LOVE!
You’ll go home with 3 new favorite things!
Snacks, drinks & fun provided. Can’t wait to see you there! ✨
📍 [Insert date, time, and location]
📩 RSVP by [date]
You can create a cute invite on Canva or even just send a group text with these details!
How It Works at the Party
When guests arrive, have them place their items on a display table.
Go around the room, and each person shares why they love their item.
Each guest picks a number out of a hat—this determines the order of choosing.
When it’s their turn, they get to select one item from the table.
Redraw numbers for each round.
Repeat until everyone has picked three items!
Do’s and Don’ts
✅ Do’s:
✔ Set a clear budget so everyone is on the same page.
✔ Encourage guests to select one really good item they personally love and bring multiples.
✔ Make it fun with drinks, snacks, and a cozy atmosphere.
✔ Let guests choose their items so they go home with things they’re excited about.
❌ Don’ts:
✖ Don’t wrap the gifts – seeing everything makes picking easier.
✖ Don’t do a white elephant-style swap where items can be stolen.
✖ Don’t make the price range too high—it should be accessible for everyone.
✖ Don’t set the price range too low. Choosing a reasonable budget helps ensure that the gifts are high-quality and feel like a special treat rather than everyday items.
✖ Avoid bringing a goody bag with multiple small items. While thoughtful, these often don’t have the same impact as one carefully chosen favorite item and tend to be picked last.
Favorite GIFT ideas:


If you’re stuck on what to bring, here are some tried-and-true favorite items that have been a hit at past parties:
I've found that the most successful items are things that feel like a little luxury—something people might have had their eye on but haven’t treated themselves to yet. For example, a candle warmer is a fantastic gift because it’s useful, but not necessarily something someone would think to buy for themselves.
On the other hand, I don’t recommend bringing a goody bag filled with multiple small items. While it might seem like a fun idea, these tend to feel like everyday purchases rather than a special treat, and they’re often chosen last. A single, well-thought-out item tends to make a bigger impact!
A Favorite Things Party is all about fun, friends, and discovering new things you’ll love! Have you ever hosted one or attended one? Let me know your favorite item you’d bring! ✨
If you enjoyed this post, you might be interested in my Primary Bedroom post.
Follow me on my socials!
Current workout and beauty favs
Current workout and beauty favs

Here are some of my current favorites!
Let's start with working out. Until last week, I had never done a workout using a resistance band before so this new, but odd contraption (for me), has been keeping me on my toes. Literally, on my toes you guys. I have to wrap this thing around my feet, squat, and walk side to side. Hoolllyy cow. The next one is a given. A banana is my life saver in food form. Whenever I'm passed out on the ground covered in sweat, these things bring me back to life. Lastly, the @FitBit is not mine, but a friend is letting me borrow it to see what I think. I'm only on day one, so I'm still open to suggestions. I for sure want something that isn't as bulky as a watch, has heart rate, sleep quality and so on. The sleeker the better. So let me know!
On to the beauty bits because I'm a sucker for all things that make me feel girly💅. First off, I currently smell amazing (when I've showered after a workout of course). So if you didn't know, the new Ralph Lauren#TenderRomance (sent to me for testing - so thank you @Influenster!) smells amaaaazing so I've been popping that in my handbag and using it daily. Plus it's boyfriend approved - aka @cogzillaattacks loves it! Lastly, the @katvondbeauty liquid lipsticks are MY JAM and I'm finding it hard to pull myself away from these babies.💄.
What else is out there that I need to try? Bring it on!

Athlete Bath Bombs

The other day I was thinking about what to buy for one of my best friends who already has everything when I remembered that she handmade me a present a few years ago and I wanted to do the same for her. (Hi Liz, now you know what part of your Christmas present is). Anyways, I was pretty excited about it, so I decided to share it with you incase you were in need of a good handmade Christmas gift as well. Now you can make these for anyone who loves a good bath, but I've catered these two recipes specifically for athlete recovery. Be ready because your house is about to smell amazzzzing.
Epsom Salt and Coconut Oil Bath Bombs : (makes 3)
Benefit: Coconut oil is moisturizing for the skin, while Epsom Salt relieves pain and muscle cramps, eliminates toxins from the body, soothes sprains and bruises, etc. Although you can use whatever essential oil you'd like, I chose Patchouli. A more earthy scent, this essential oil is known for being an antidepressant and sedative, helps speed up the recovery of wounds and prevents them from developing infections, and lastly is an aphrodisiac.
1 1/4 cup Baking Soda
2/3 cup Corn Starch
2/3 cup Citric Acid (It took me forever to find this. I found it in the canning section of Walmart)
2/3 cup Epsom Salt
2+ teaspoons water
2 teaspoon essential oil (I used patchouli)
2 1/2 teaspoons melted coconut oil
4+ drops of food coloring
Items You Will Need:
Mold (I bought mine on Amazon, here)
Mixing Bowls
Whisk
Measuring cups
Measuring spoons
Tray
Metal Utensil
Start by combining the four dry ingredients and whisking until the clumps are gone. In a separate bowl, combine and mix the water, essential oil, and coconut oil (don't forget to melt your coconut oil). Optional: you can go ahead and add the food coloring now for one color bath bombs, or later if you want multi colored bath bombs - like I did below.
Now you're going to SLOWLY whisk in the wet ingredients with the dry ones. If the mixture starts to fizz, go slower. Once it's all combined, it should be the consistency of wet sand. If it's too dry, you can add a bit more water. I separated my final mixture into a few different bowls so I could add different colors to each.
Now you need to OVER fill both sides of your bath bomb mold. I found that packing in the mixture tightly and adding a bit more at the end before I put them together worked best for me. Do this over your bowl because you're going to lose some of the extra as your fitting the two sides of the mold together. Lightly tap the filled bath bomb mold with a metal spoon (or whatever you have around). Begin by removing one side of the mold carefully, and then the other. Put on a tray and let it dry 1-2 days, That's it! I had no problems with the mixture not sticking to each other or breaking apart, but they are very delicate so be gentle.


The next is the Oatmeal Bath Bomb. Quick tip: Although this one is pretty and full of benefits, the oatmeal in the mixture made it harder for both sides of the mold to stick together. It's totally worth it and I've put more tips in the recipe section to help you out. I recommend only using one color or not using the food coloring at all. Incase you don't have the mixture damn enough, this allows you to retry without mixing up your pretty colors.
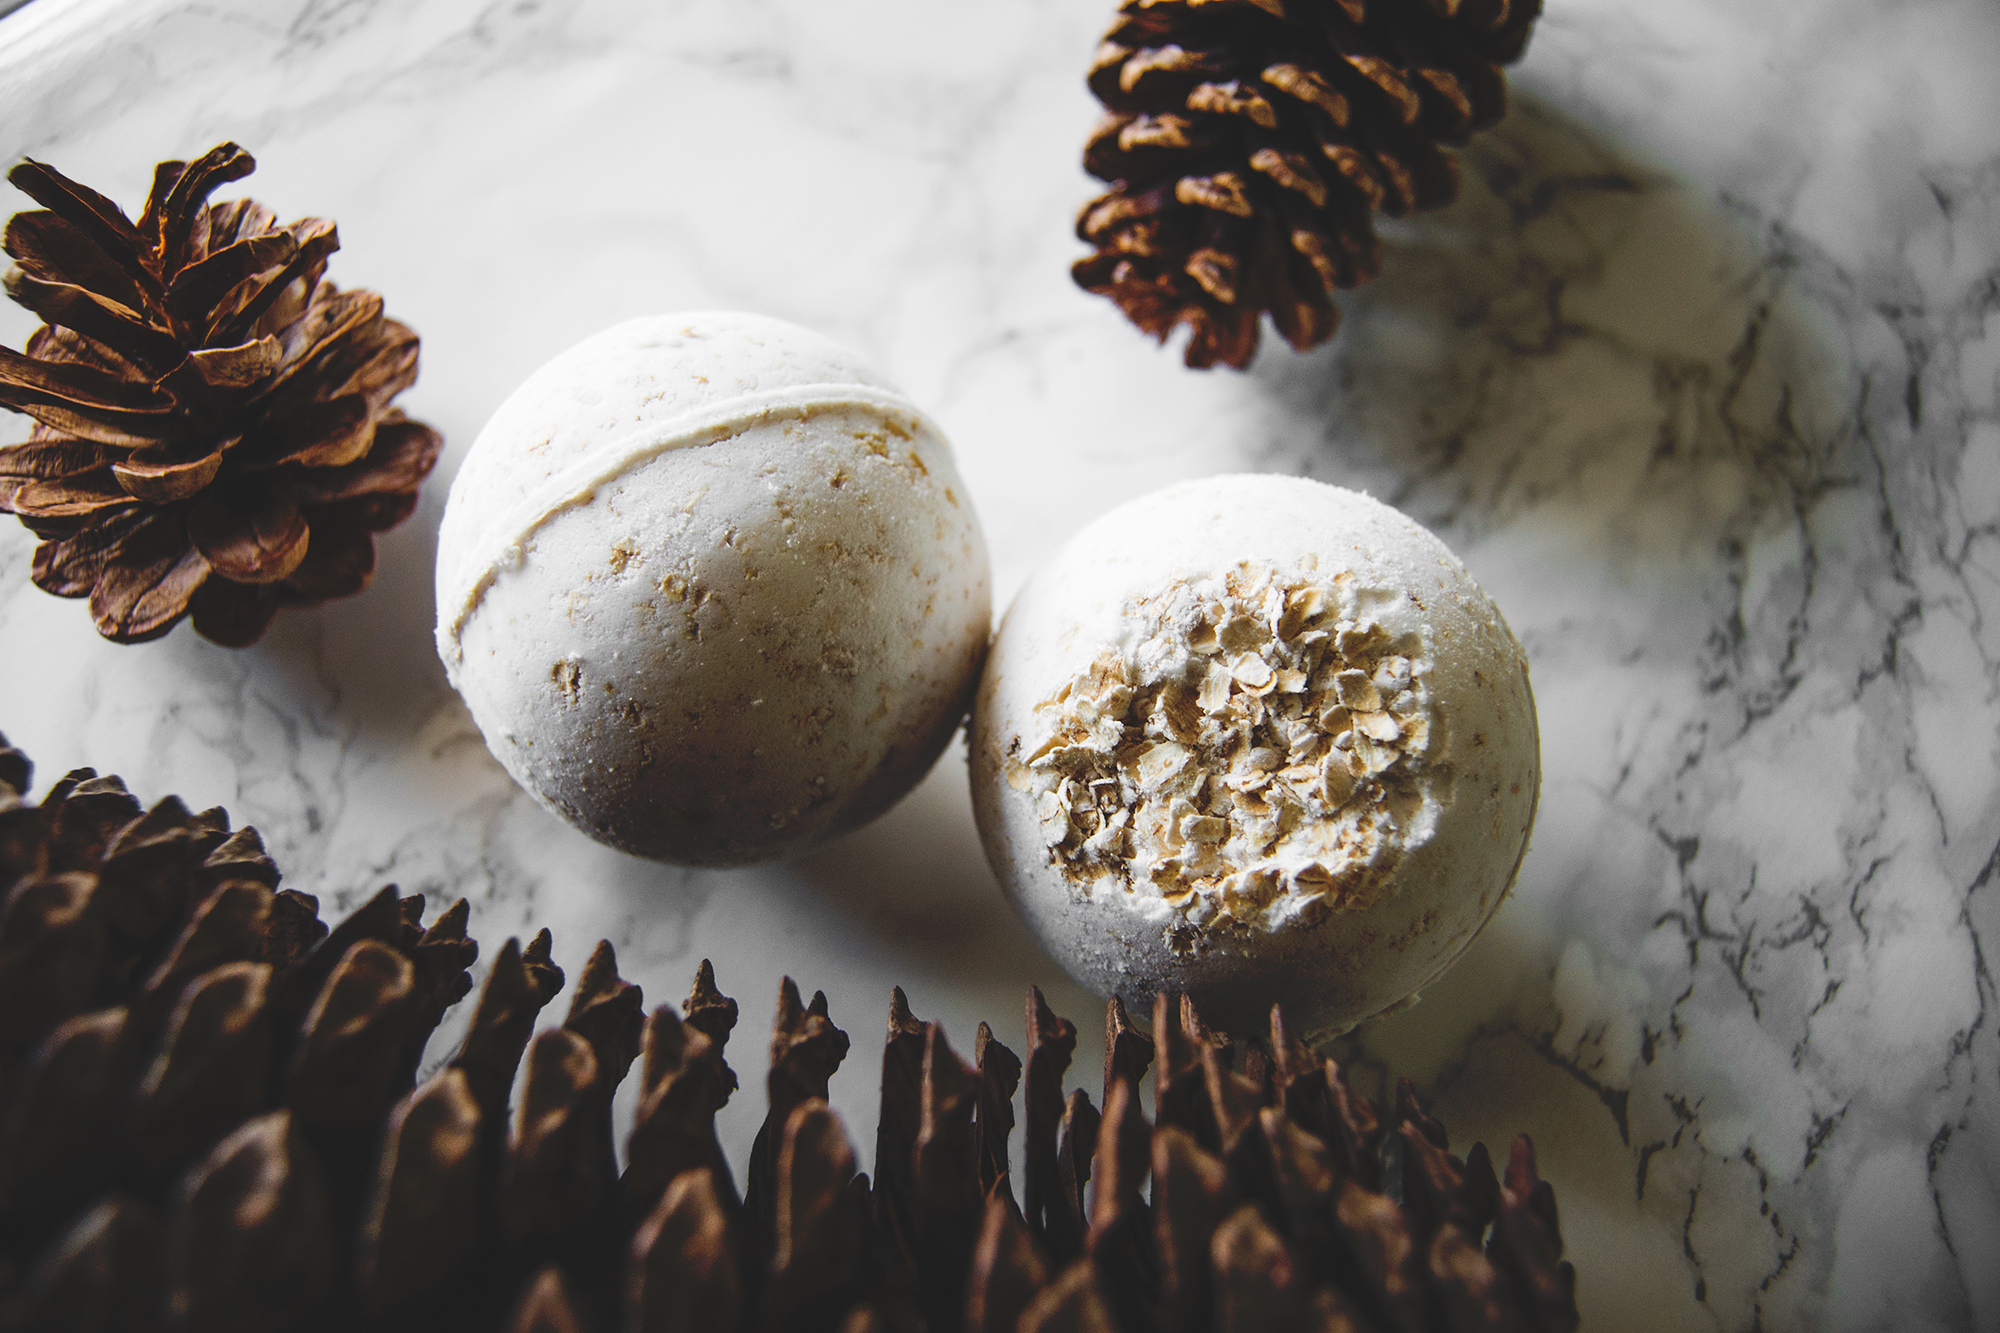
Oatmeal Bath Bomb (makes 2)
Benefits: Oatmeal makes for a very relaxing bath. It's great to cleanse your skin and lock in moisture. Lavender is known to be anti-inflammatory, reduces anxiety, improves sleep and helps heal wounds. Witch Hazel disinfects wounds, helps balance skin, treats sunburn, etc.
2/3 cup Baking Soda
1/3 cup Corn Starch
1/2 cup quick oats
1/3 cup Citric Acid
1 teaspoon Witch Hazel
1-2 teaspoons water
1 teaspoon essential oil (I used lavender for this one)
You'll want to follow the same method as before. Whisk the dry ingredients together in one bowl and the wet in another. Slowly combine them together and try not to let the mixture fizz. Once it's the consistency of wet sand, pack and overfill both sides of your mold. If it doesn't stick together, try whisking in a little more water and attempt again. I found that making the mixture a little more damp than my first recipe helped the two sides of the mold to stick together.
Lightly tap the filled bath bomb mold with a metal spoon (or whatever you have around). Begin by removing one side of the mold carefully, and then the other. Put on a tray and let it dry 1-2 days before using!

Low maintenance At-home gel Manicure
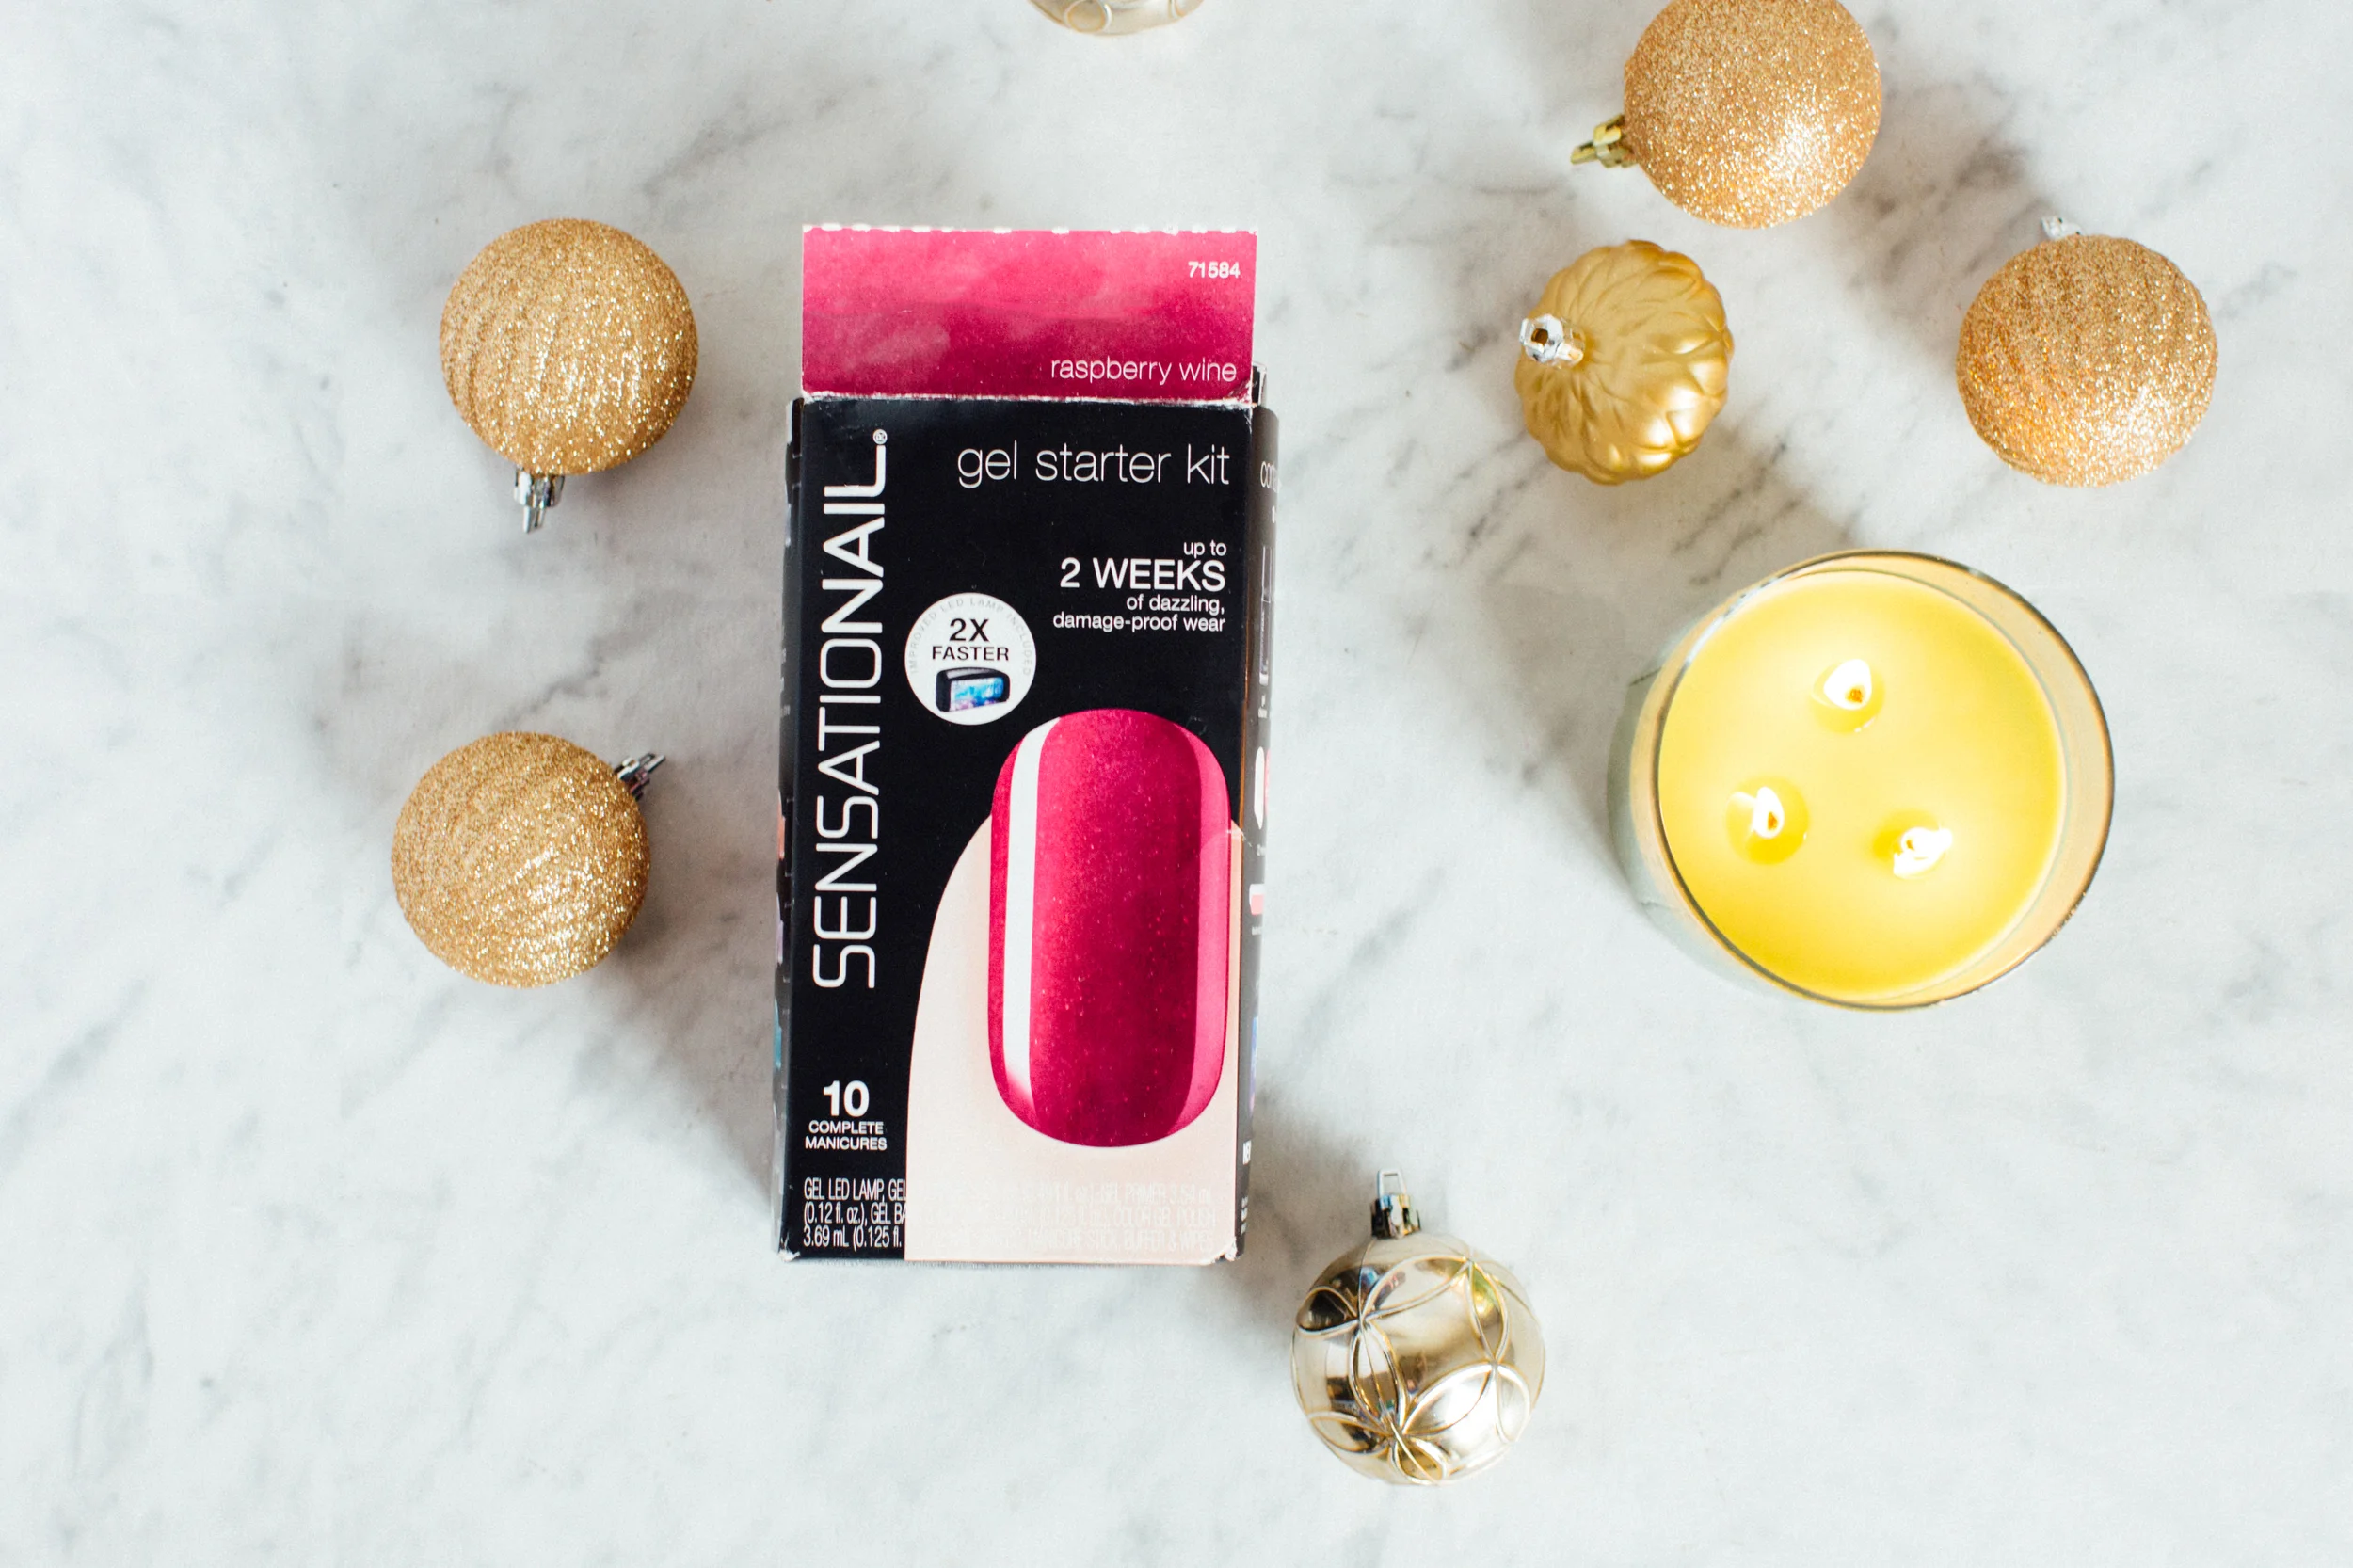
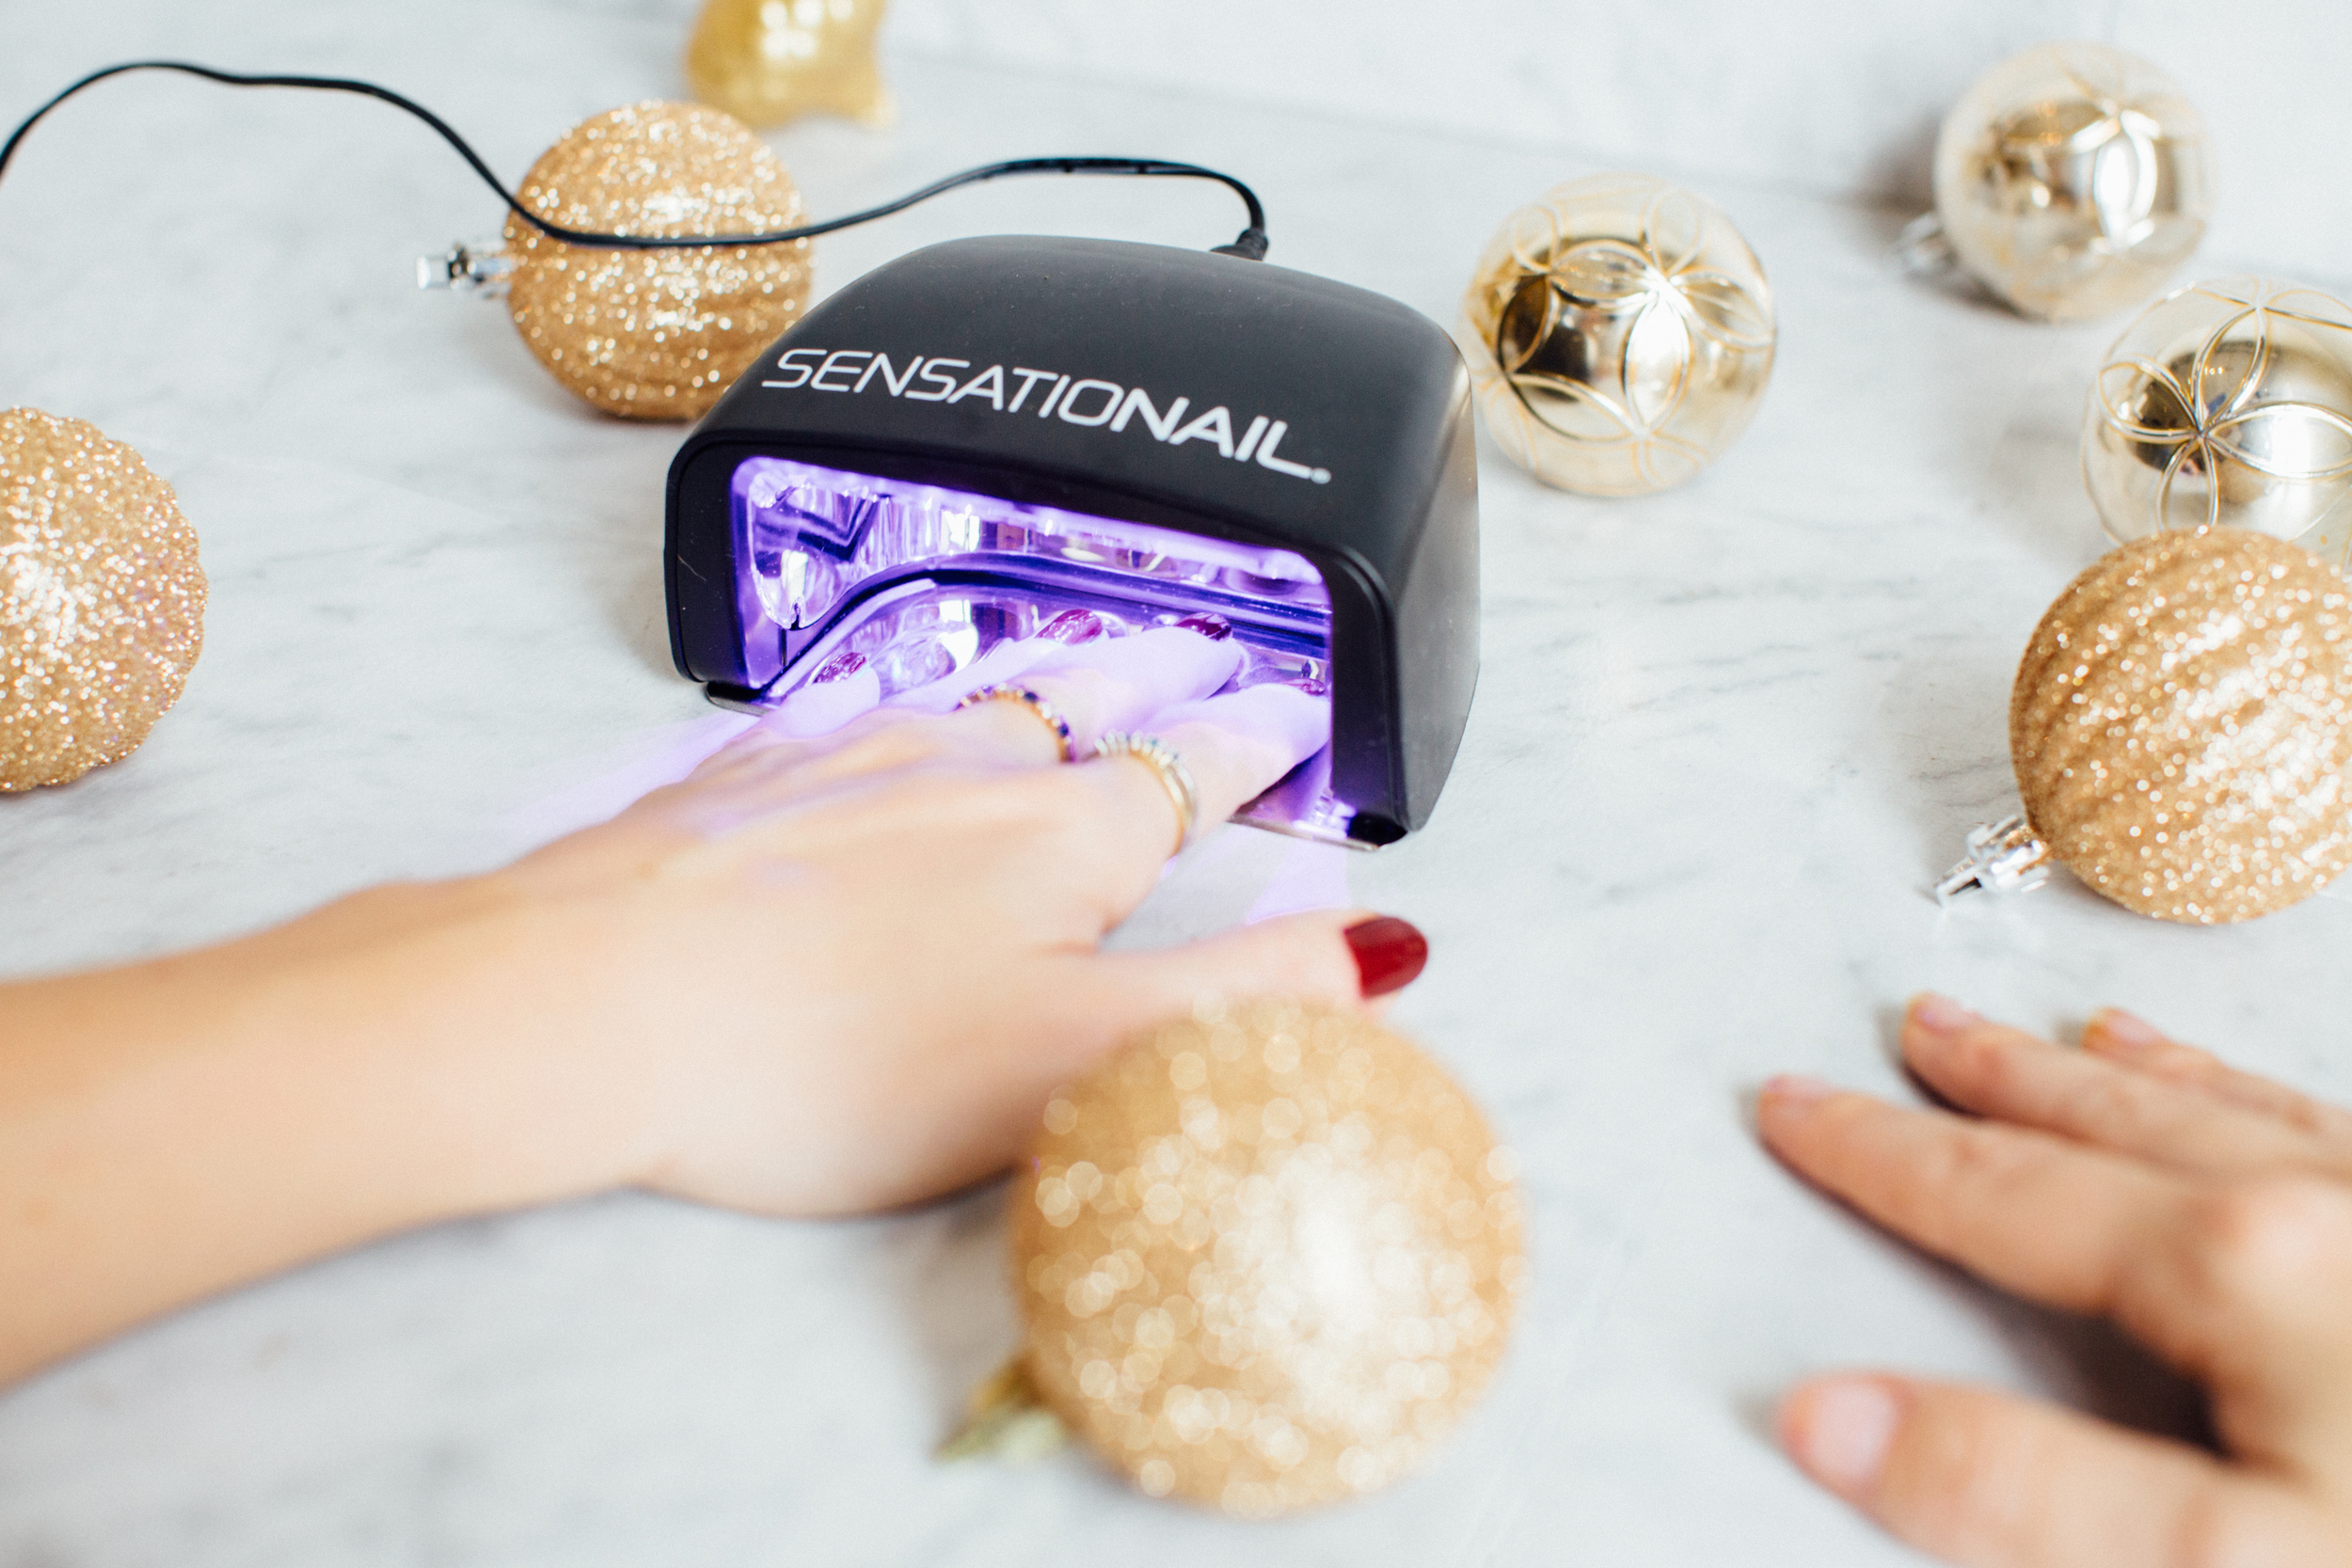
Let me start off by saying that I'm not really great at doing my nails, but I don't have much time to make it to the nail salon when they're open. Because of this, I usually end up painting my nails late at night which means they never dry enough to not smudge before bed. However, I have great news! I discovered Sally Hansen SensatioNAIL! The "Gel Starter Kit" comes with everything you need for your own at-home gel manicure. The only thing different here is that I purchased the color "Miss Behave" and used that instead of the "Raspberry Wine" color that came with the kit. I also want to note that these hold up SO well during cyclocross and my daily life. No chipping! Heck yes!
I purchased my kit from Amazon (link here) because it was cheaper than Target or Walmart, but shop around to make sure there hasn't been any price changes. The kit says you get 10 manicures from this kit and if that's so, I'll end up averaging $3.32 for each manicure. Um, yes please! That's way less expensive than going to the salon.
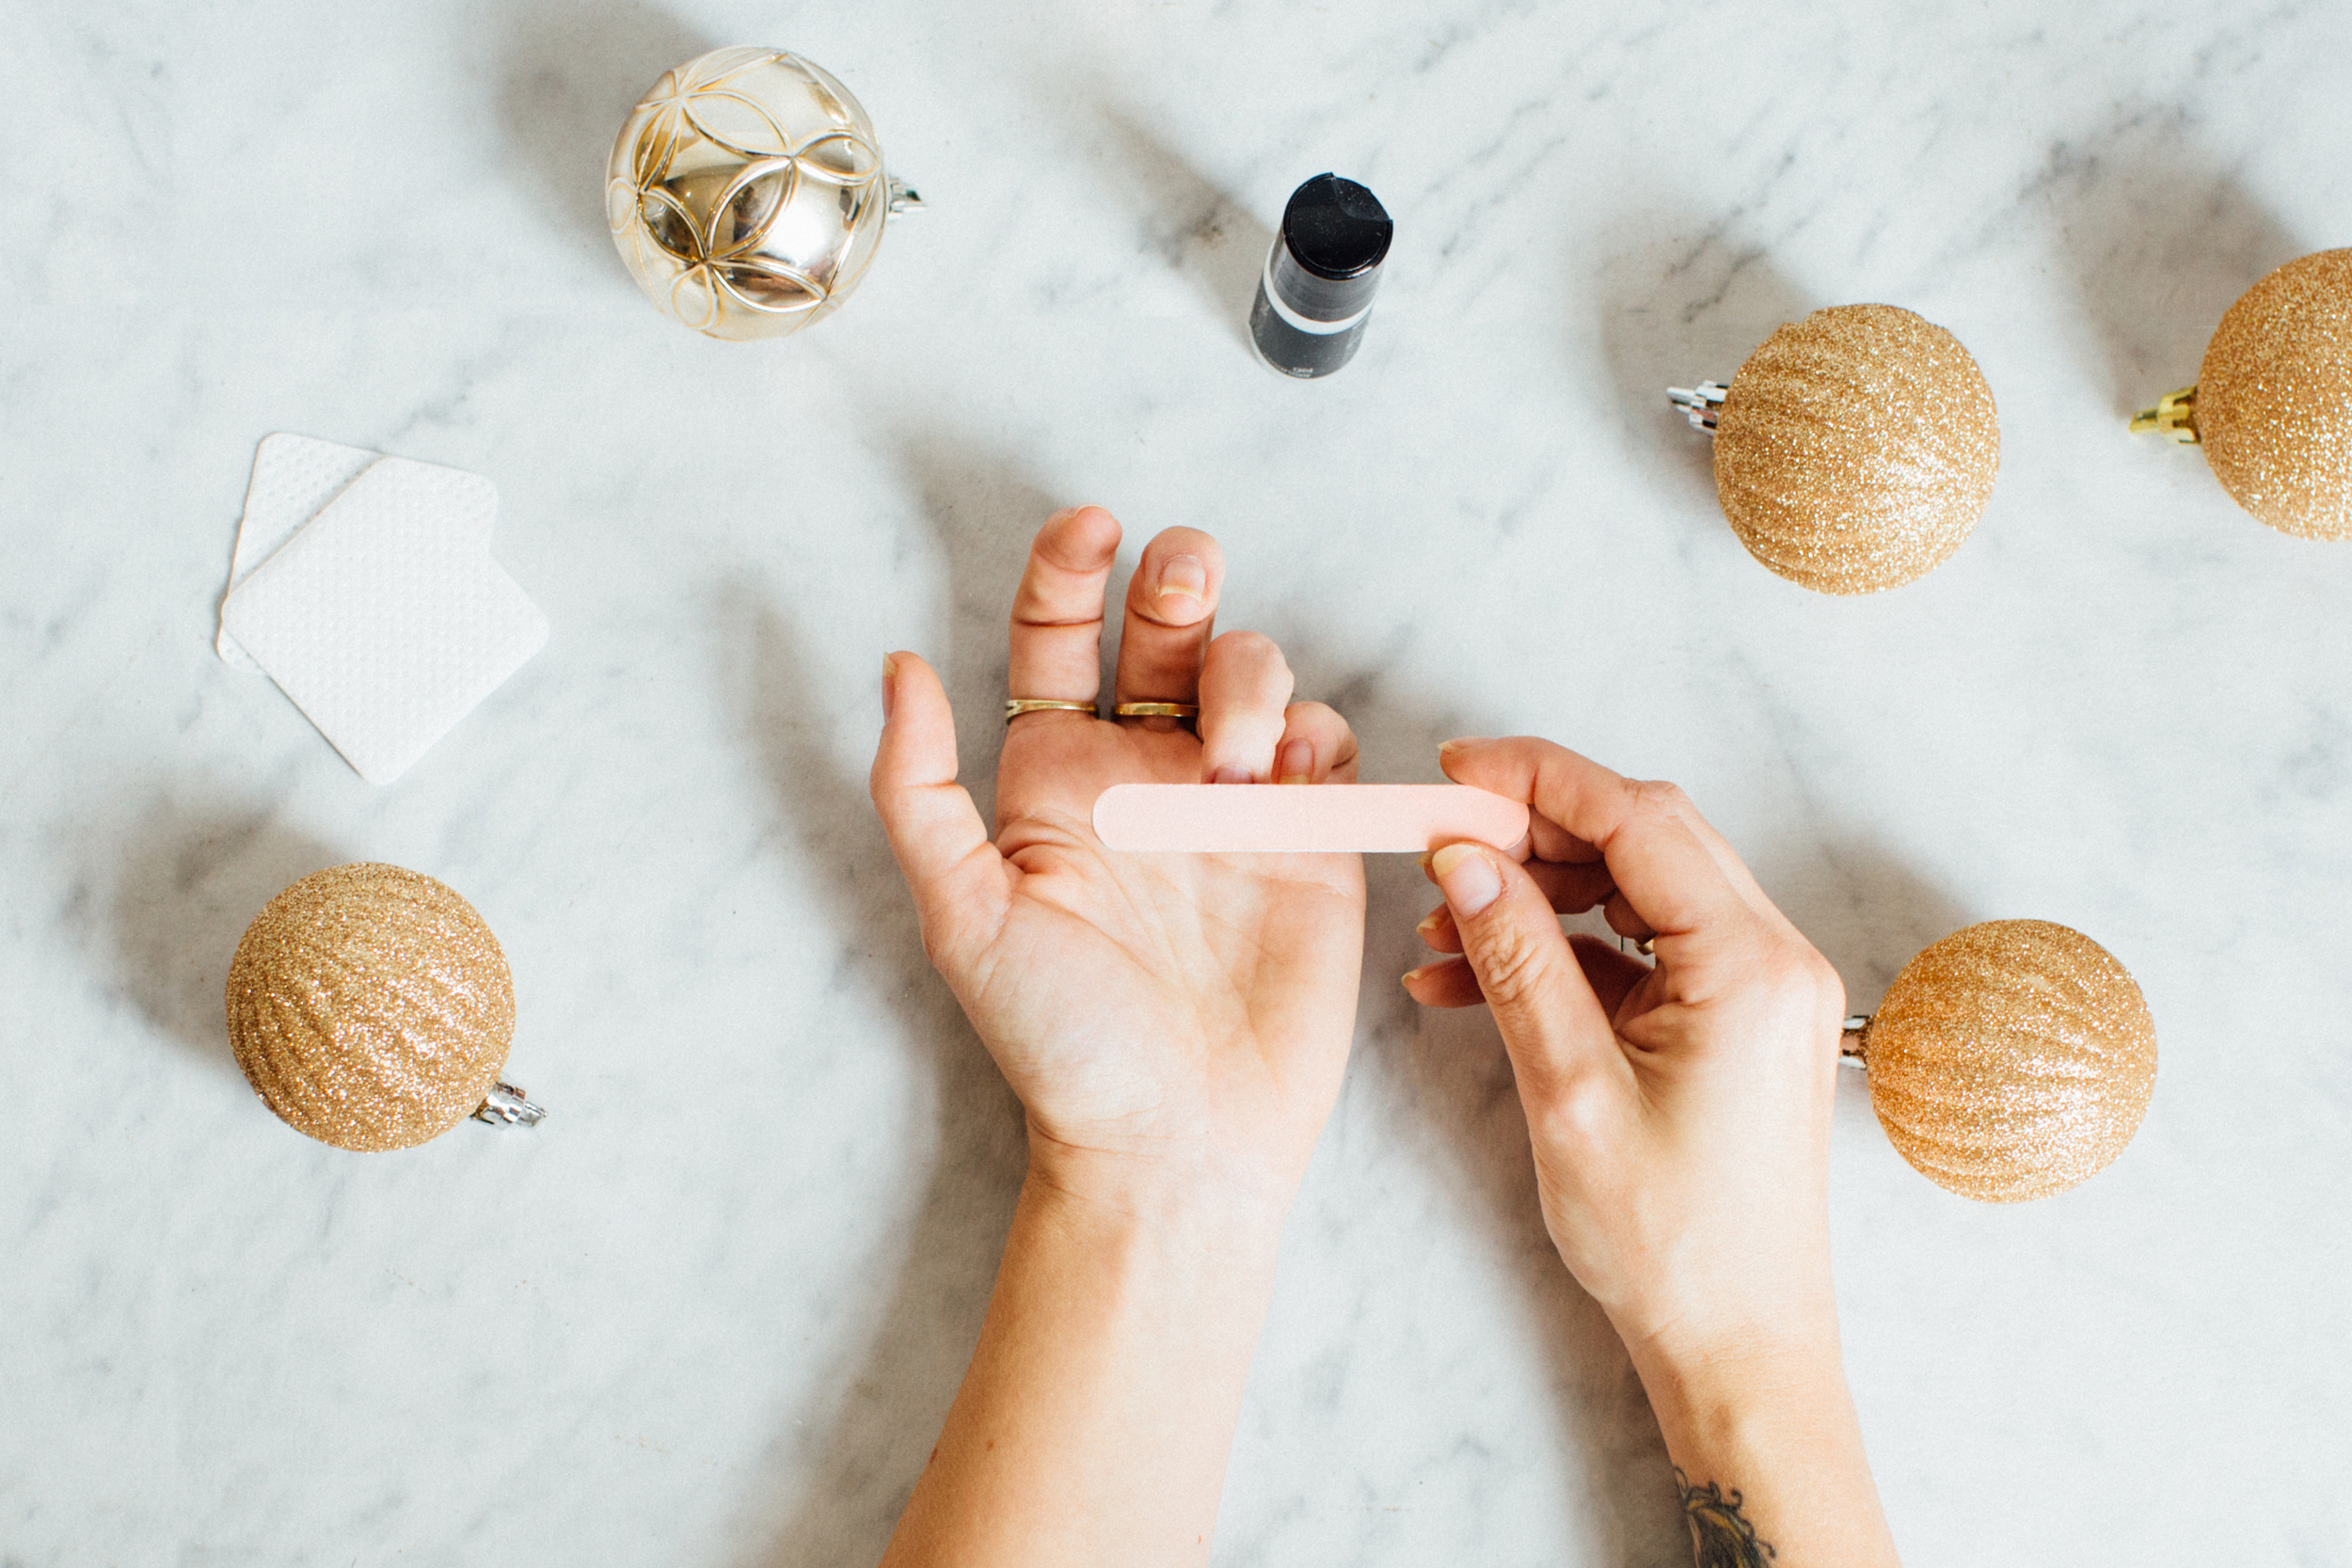
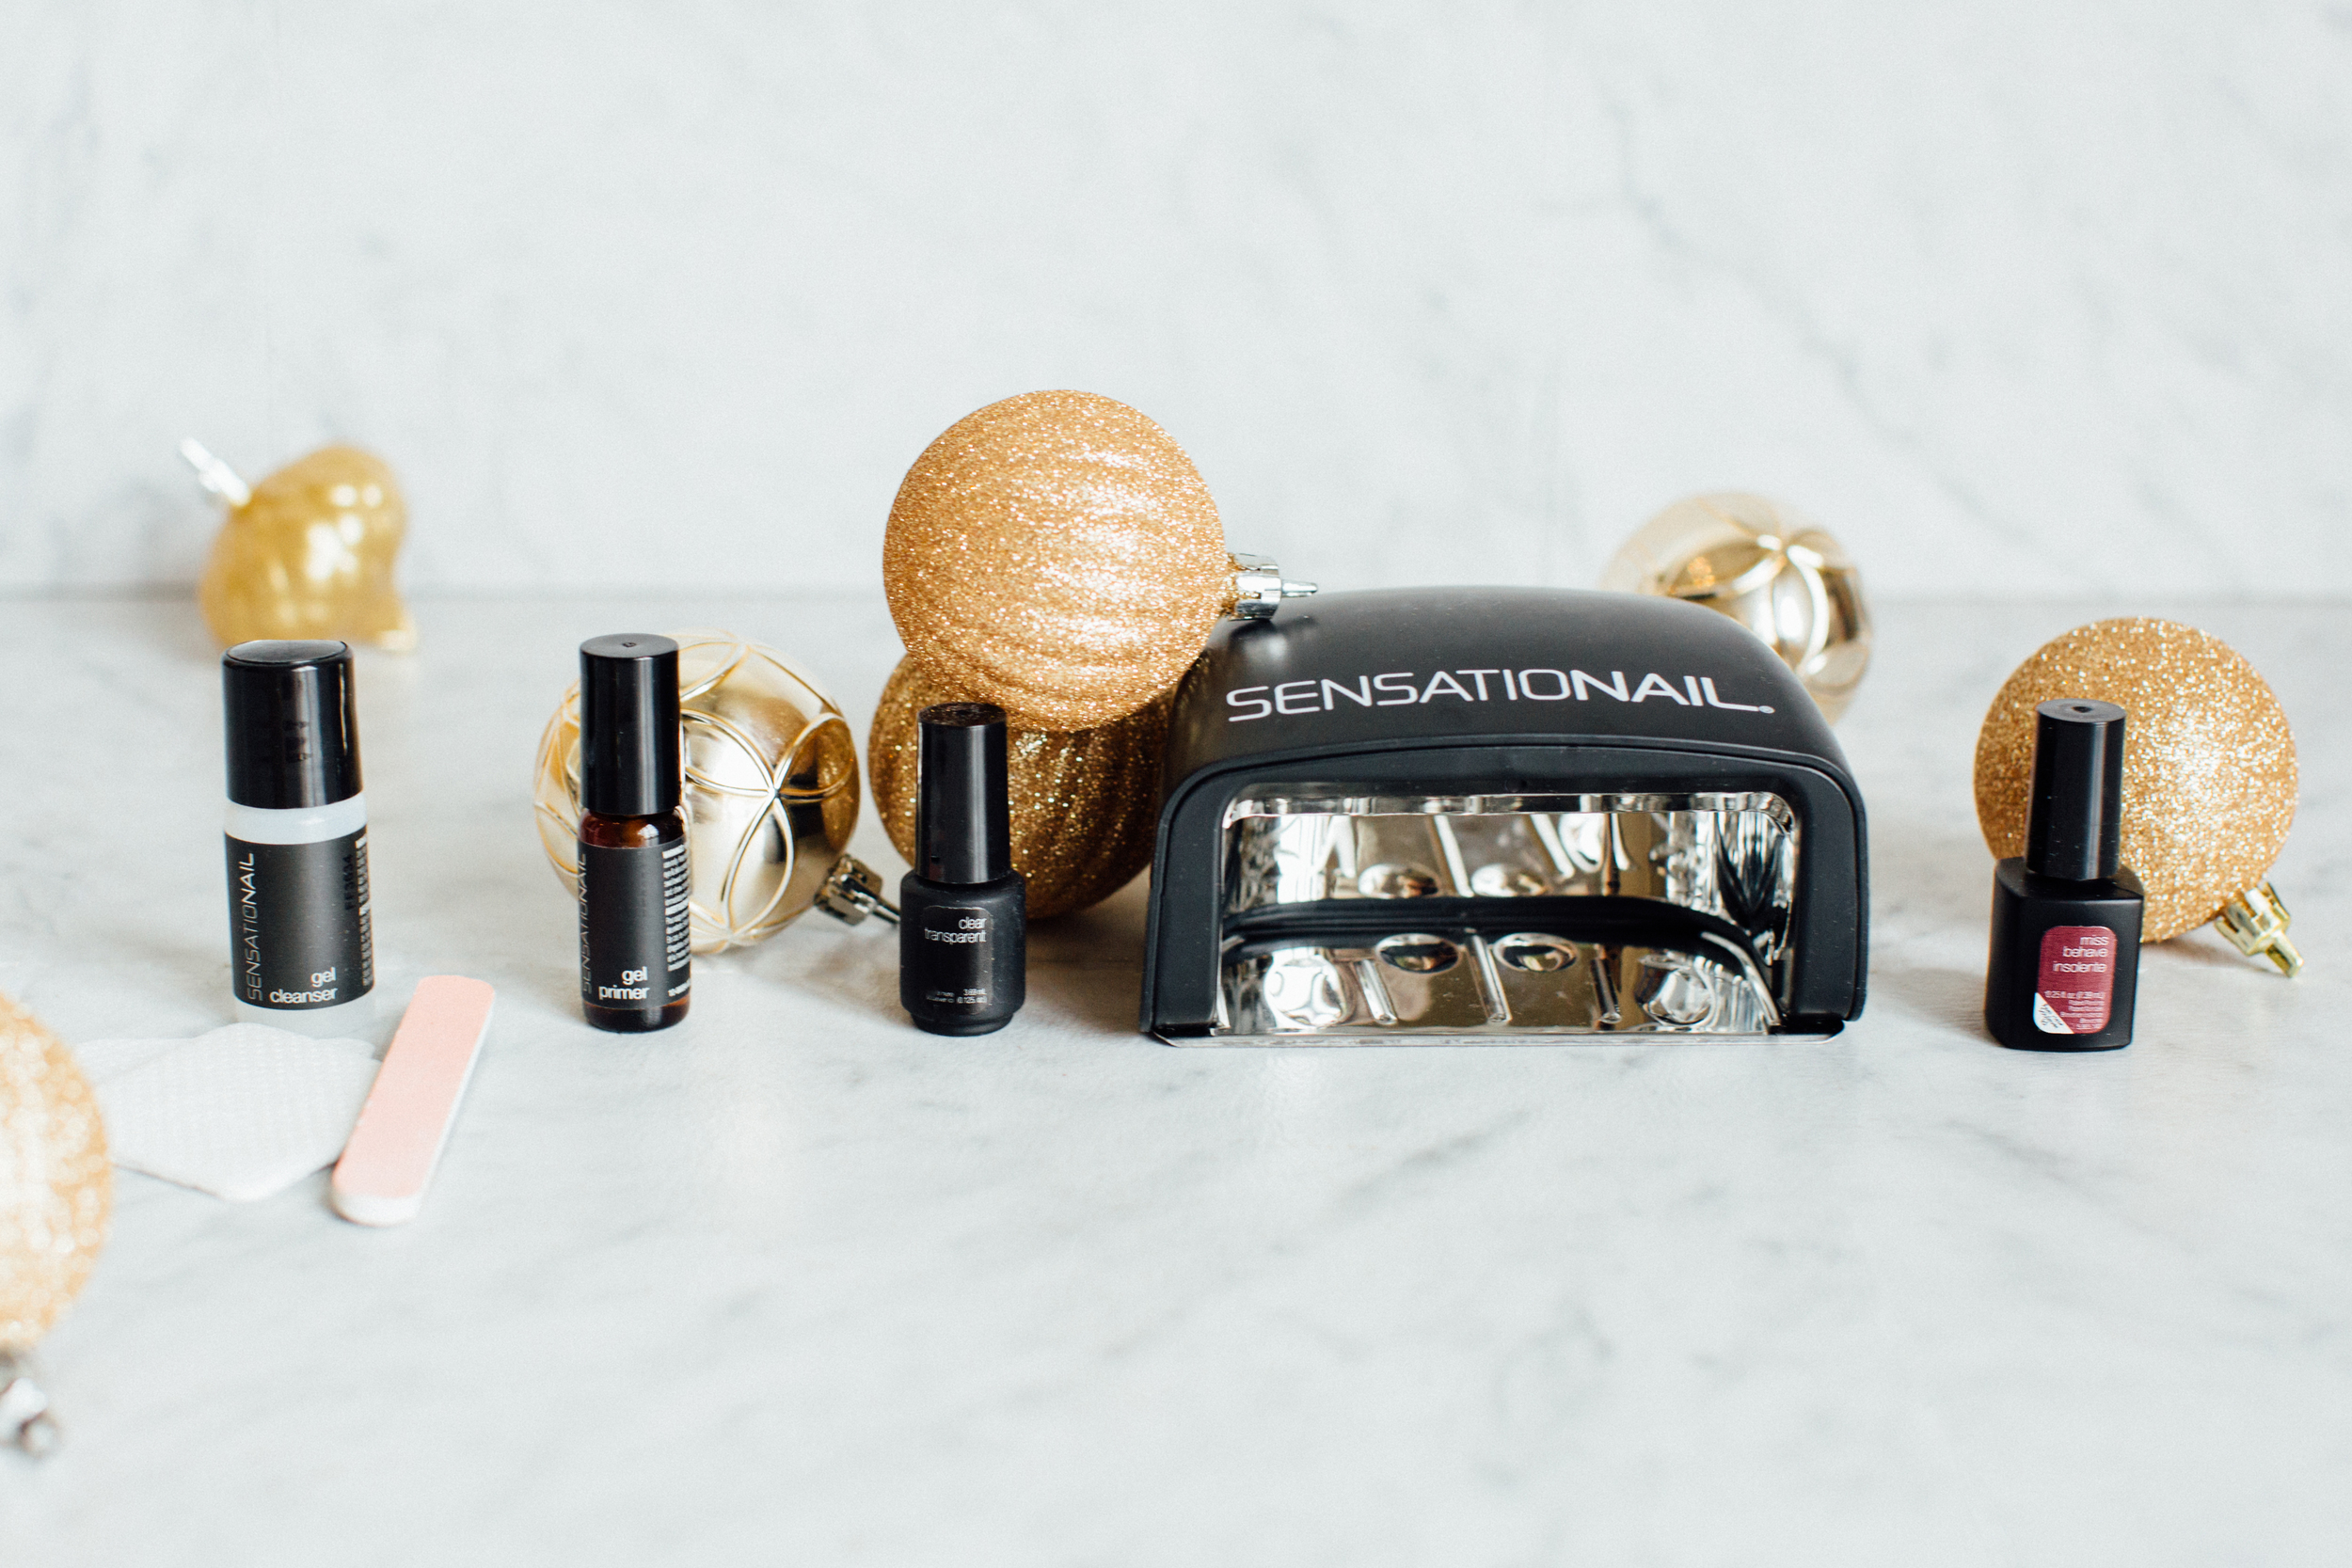
Step 1: Prepare your nails. File, buff, remove cuticles, etc

Step 2: Use the lint-free wipes and clean your nails with the "Gel Cleanser"

Step 3: Apply a layer of the "Gel Primer" to nails

Step 4: Apply a layer of the "Gel Base & Top Coat"

Step 5: Cure your base coat using the LED lamp for 15 seconds. The lamp will blink with 15 seconds is up. I usually have to do my thumb by itself because it doesn't fit in the lamp with my other four fingers

Step 6: Now it's time to apply your "Color Gel Polish"
Step 7: Cure your "Color Gel Polish"
Step 8: Paint a second coat of the "Color Gel Polish" and then cure for another 30 seconds.
Step 9: Apply a layer of the "Gel Base & Top Coat" and cure for 15 seconds.

Step 10: Your nails will be a bit sticky at this point, so don't touch them yet. Use the "Gel Cleanser" and the lint-free wipe across all of your painted nails. This part seemed odd to me, but trust me, you're nails won't budge. They are totally hardened at this point!
Step 11: Unless you can do every step to all 10 nails at the same time, it's time to repeat all of the steps on your other hand.
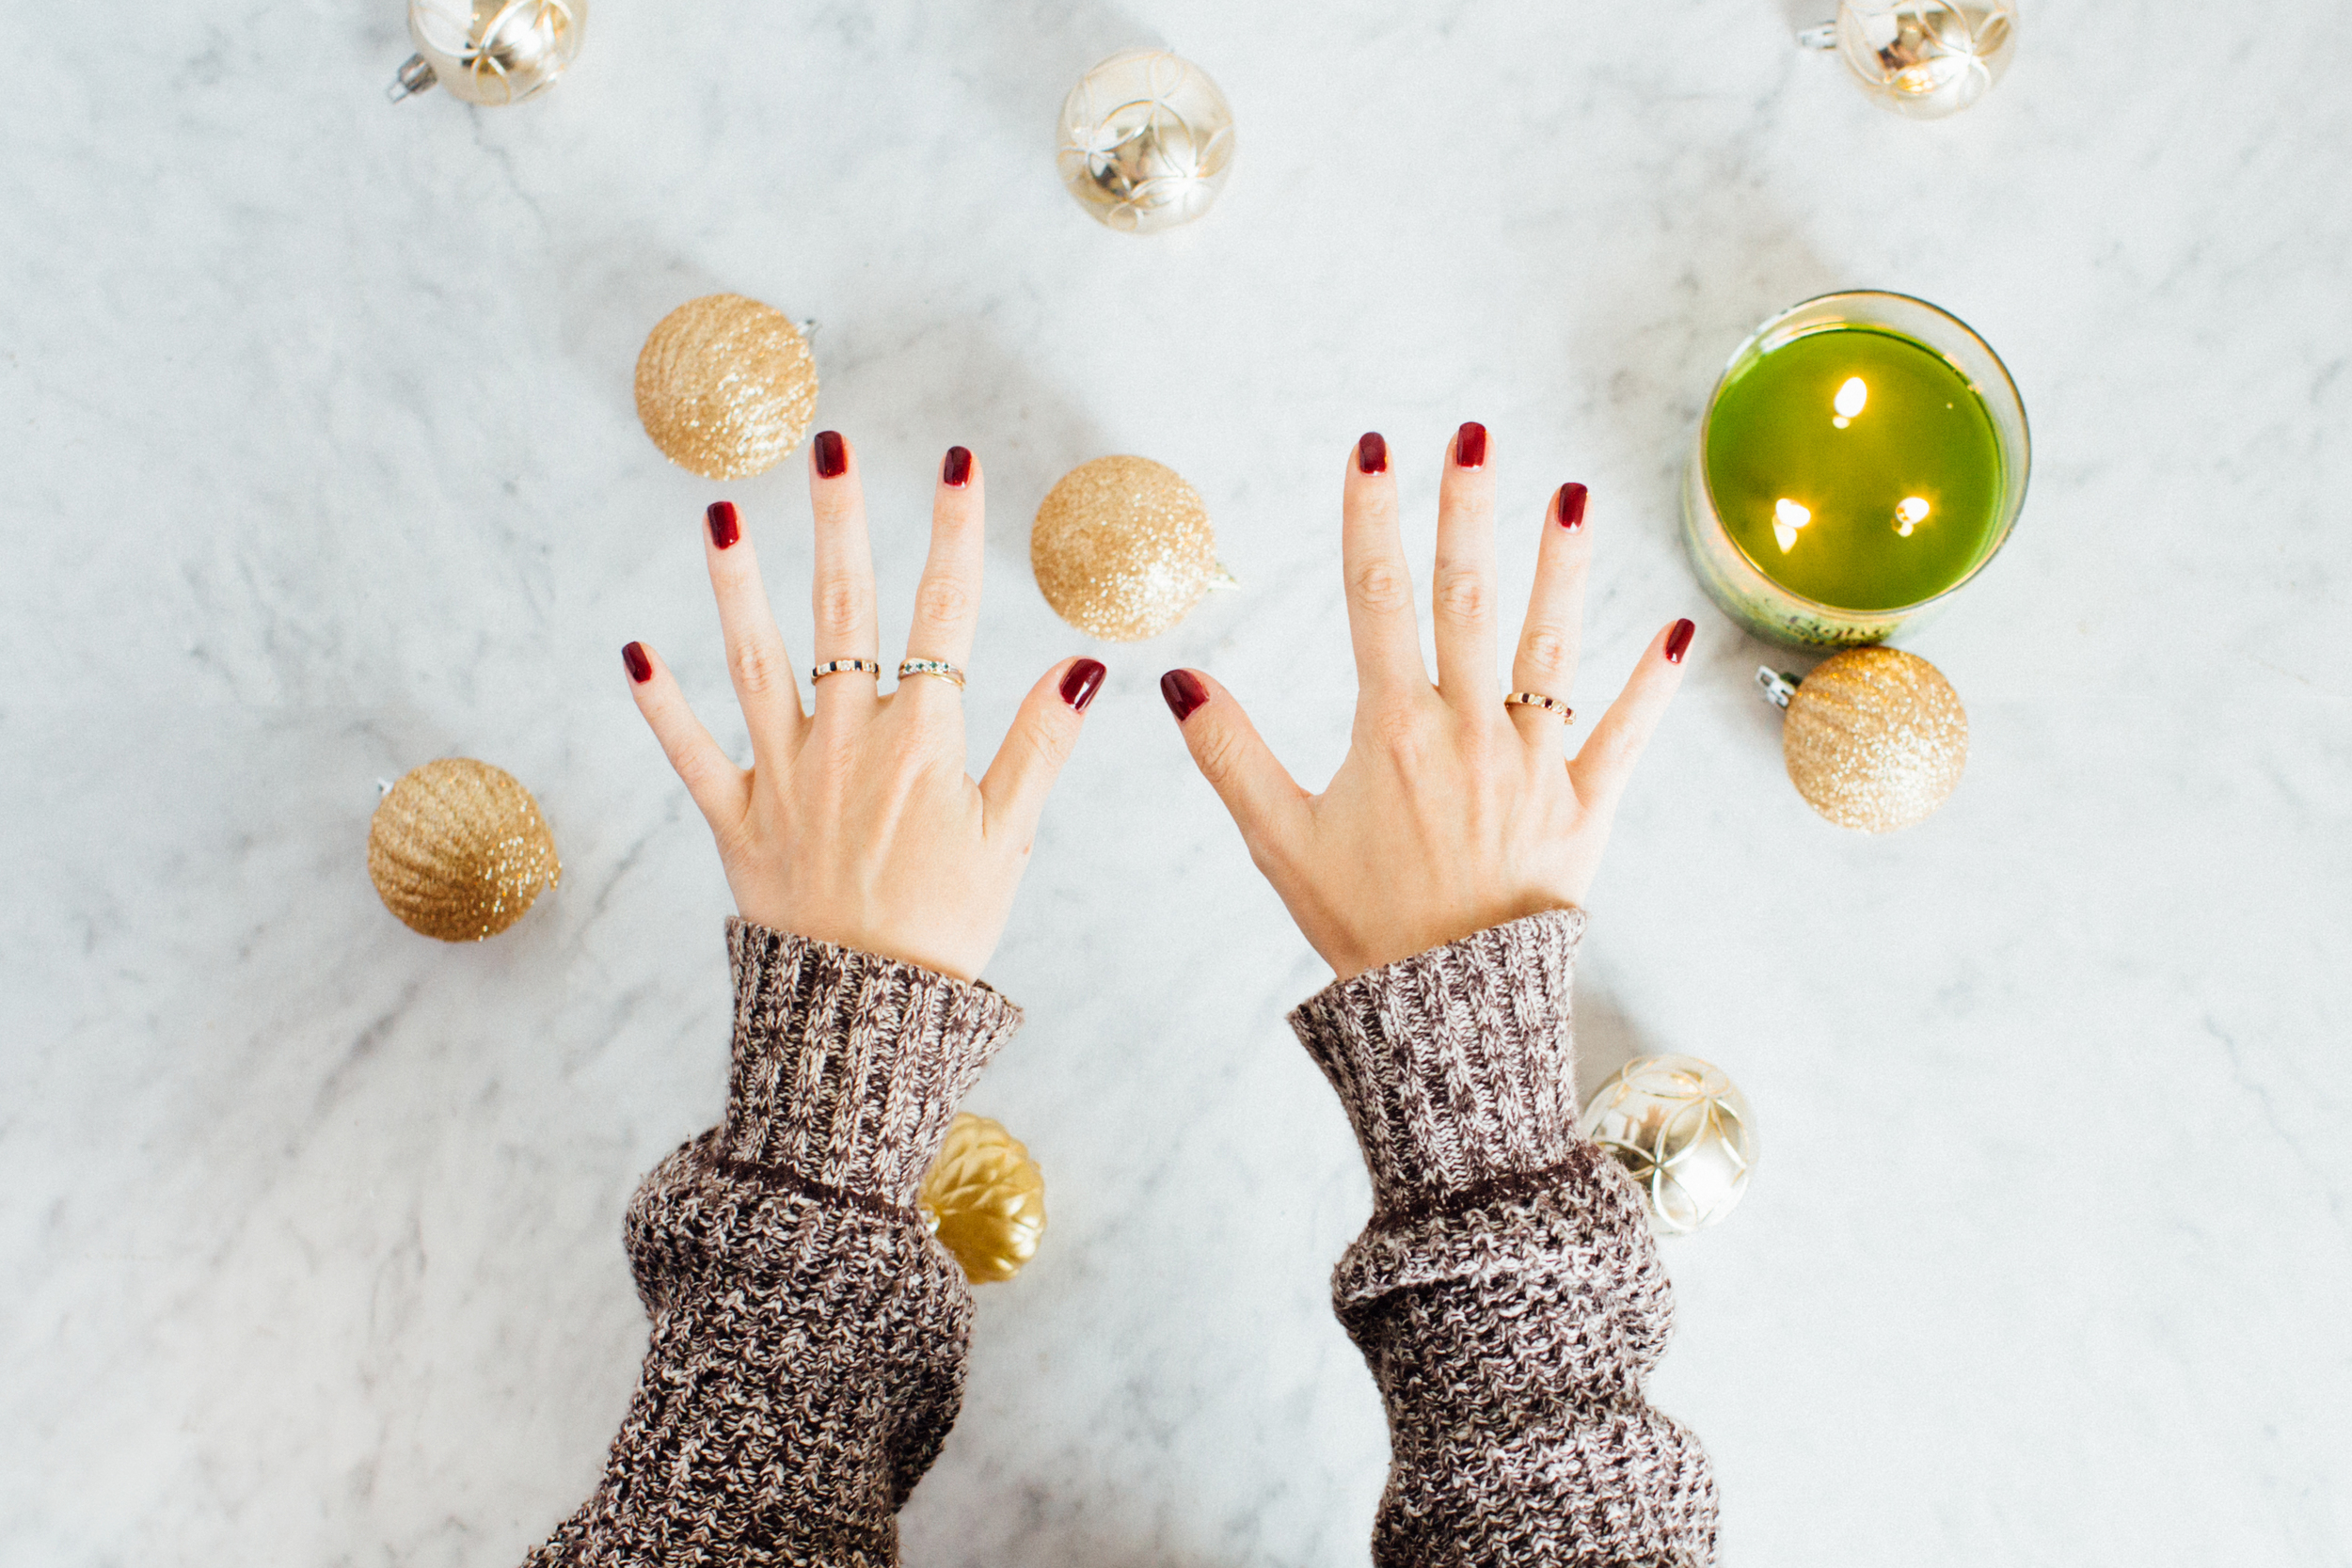
Now you're done! Perfectly dry and chip-free nails! You may proceed with your day without risking a mess up!
Tip for removing the polish. If you've ever had a gel manicure before you know how hard it is to remove the polish. Pure acetone alone will NOT work so I have three suggestions for removal. Method 1: Soak your nails in a bowl of pure acetone and buff the polish off with a file and manicure stick. The longer you can soak, the easier it will be to remove the polish. Method 2: Rip up a few paper towels and apply an acetone-soaked piece to each nail. Wrap each nail/soaked paper towel combo with foil. Let soak for a while or have a friend use a blow dryer on low to apply heat and speed up the process. Proceed to buff the polish off with a file. Method 3: Stop by your local cheap and quick nail salon and pay the $5 or so and have them remove the polish for you.
If you've used this kit or are planning on trying it out, let me know!