DIY Halloween String Lights with Plastic Jack-o’-Lantern Pails

If you’re looking for a budget-friendly way to add some spooky charm to your outdoor Halloween setup, this DIY is for you. With just a few tools and those classic plastic Jack-o’-Lantern trick-or-treat pails, you can turn an ordinary set of string lights into a glowing row of pumpkin lanterns.
What You’ll Need
A box (for easy cleanup)
Step-by-Step Instructions
Step 1: Peel off any stickers from the bottom of the Jack-o’-Lanterns.
Step 2: Use your cutting pliers to carefully snip off the plastic handles. This will leave two small holes on the sides of each pumpkin that you’ll use later.
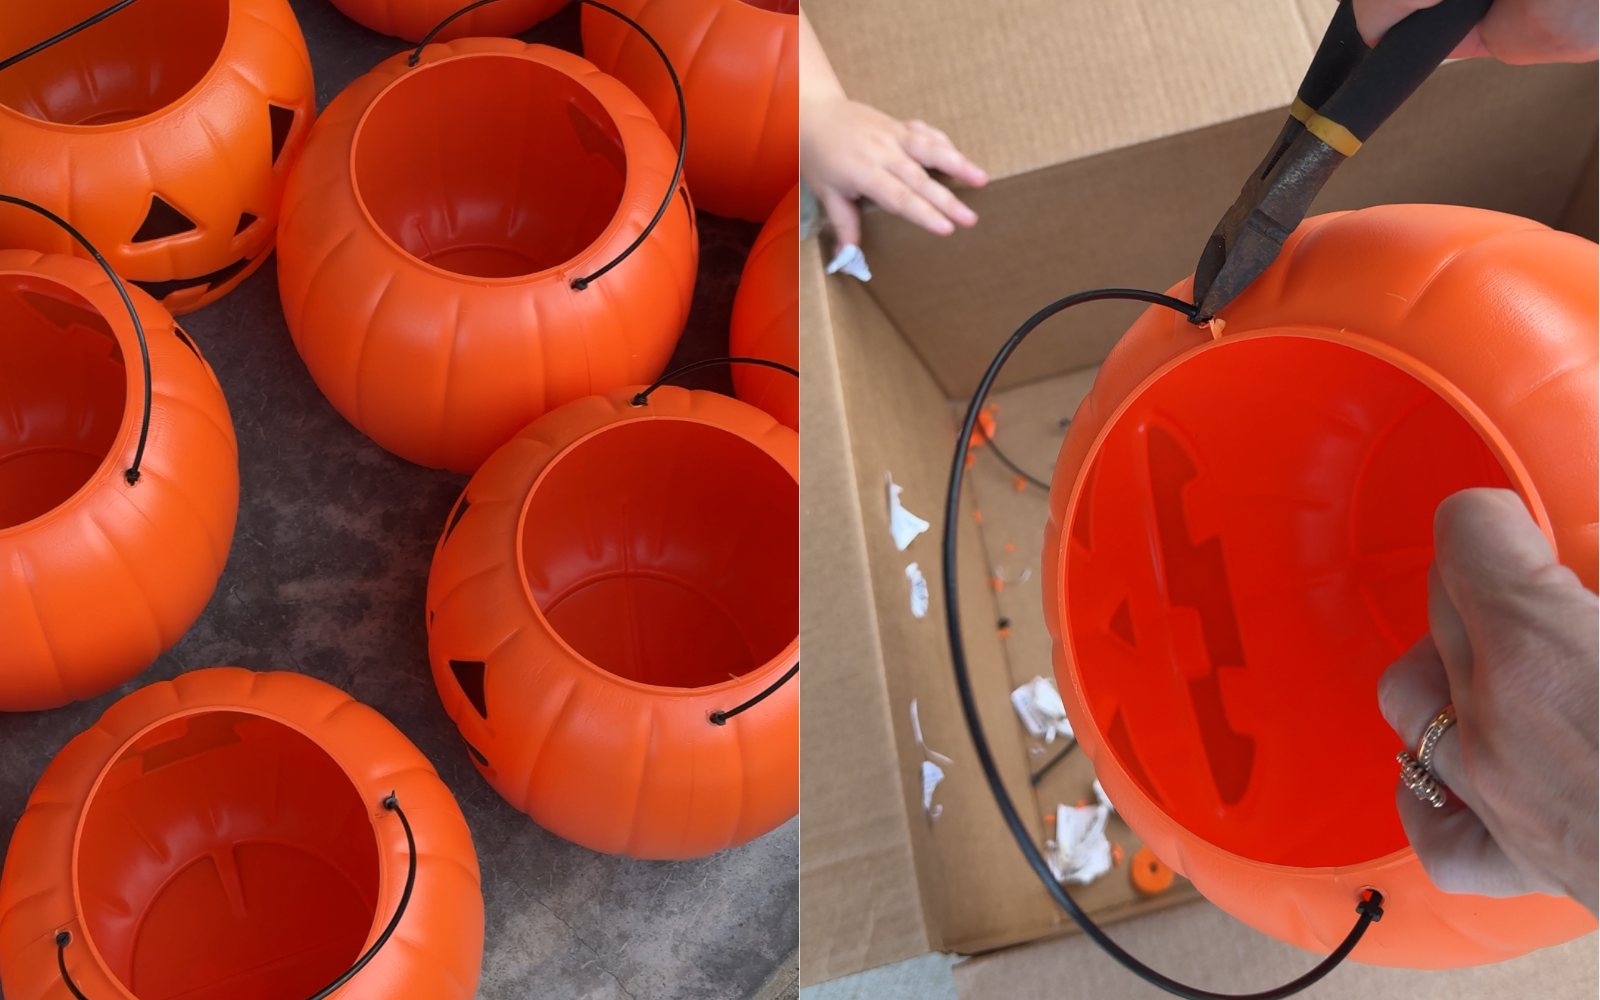
Step 3: Drill Drainage Holes. Using a 1 1/8" spade drill bit, drill a hole in the bottom center of each pail. This allows rainwater to pass through if your lights are outdoors.
💡 Pro Tip: Place the pumpkins over a box while drilling, removing stickers and cutting off handles so all the pieces and plastic shavings fall inside. It makes for an easy clean up!

Step 4: Feed a zip tie through each handle hole of each pumpkin. These will secure the pumpkins to your string lights.
Step 5: Attach to the Lights. Place each Jack-o’-Lantern over a bulb on your string lights. Once it’s centered, tighten the zip ties around the wire so the pumpkin stays in place. I alternated the faces so I could see them from both my living room and back yard.
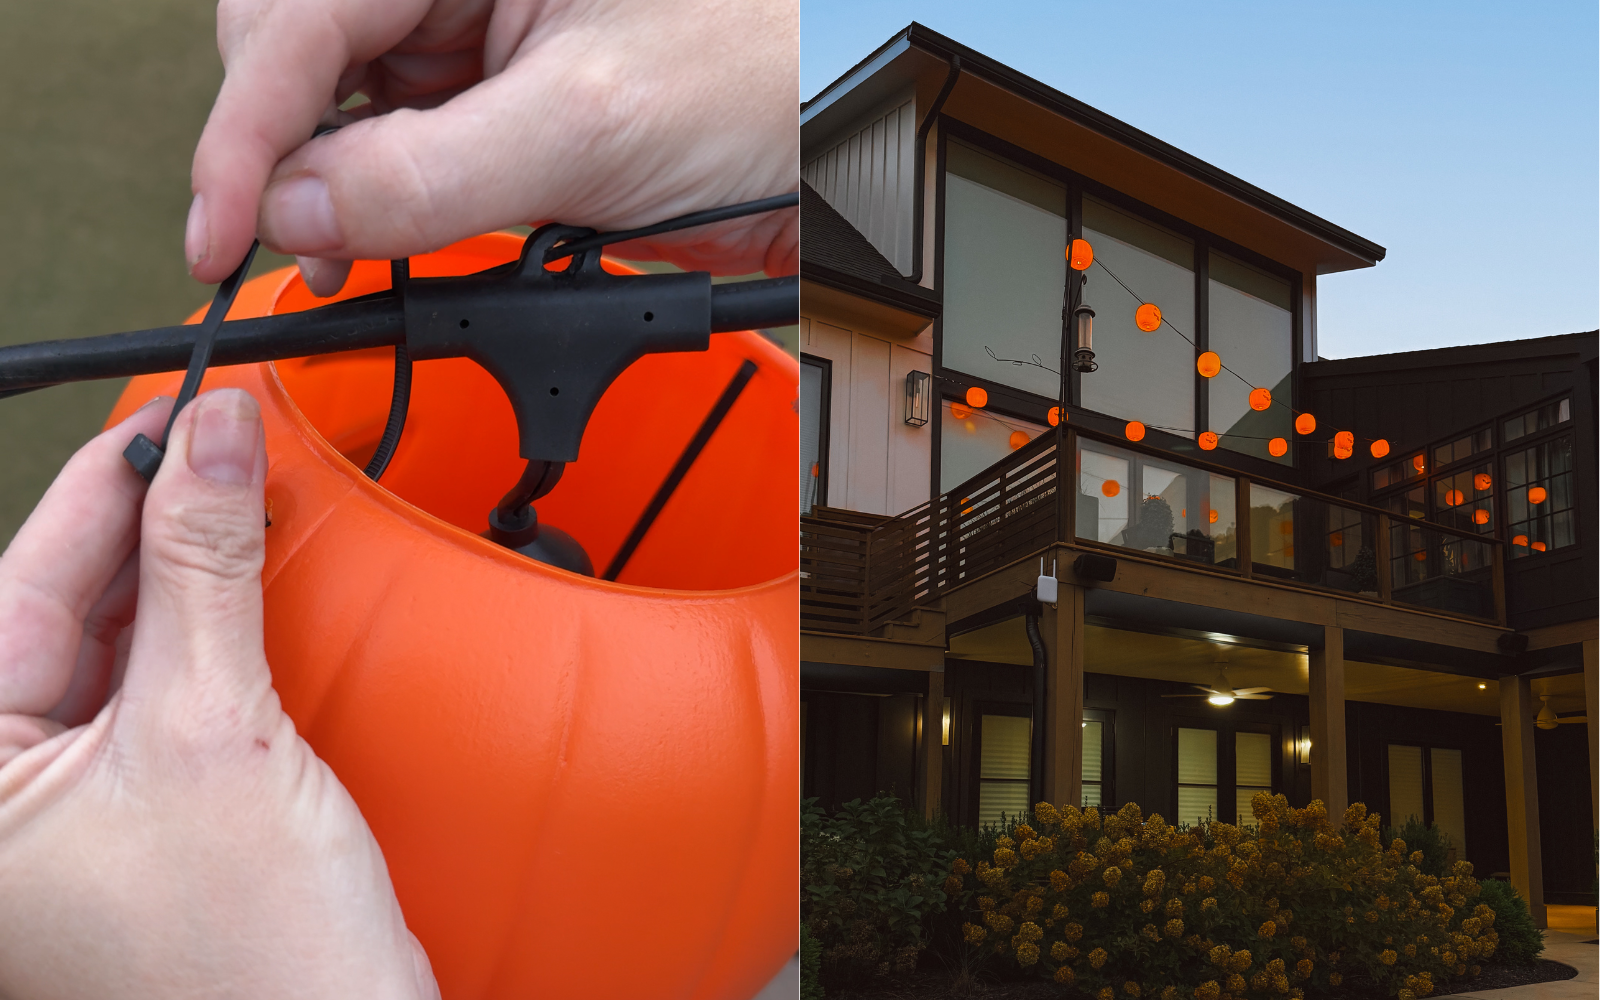
Step 6: Snip Off the Extra. Use your cutting pliers to trim off the excess zip tie for a clean finish.
And that’s it! You’ve got yourself a glowing line of cheerful (or spooky!) Jack-o’-Lantern lights perfect for Halloween.