
DIY Halloween String Lights with Plastic Jack-o’-Lantern Pails
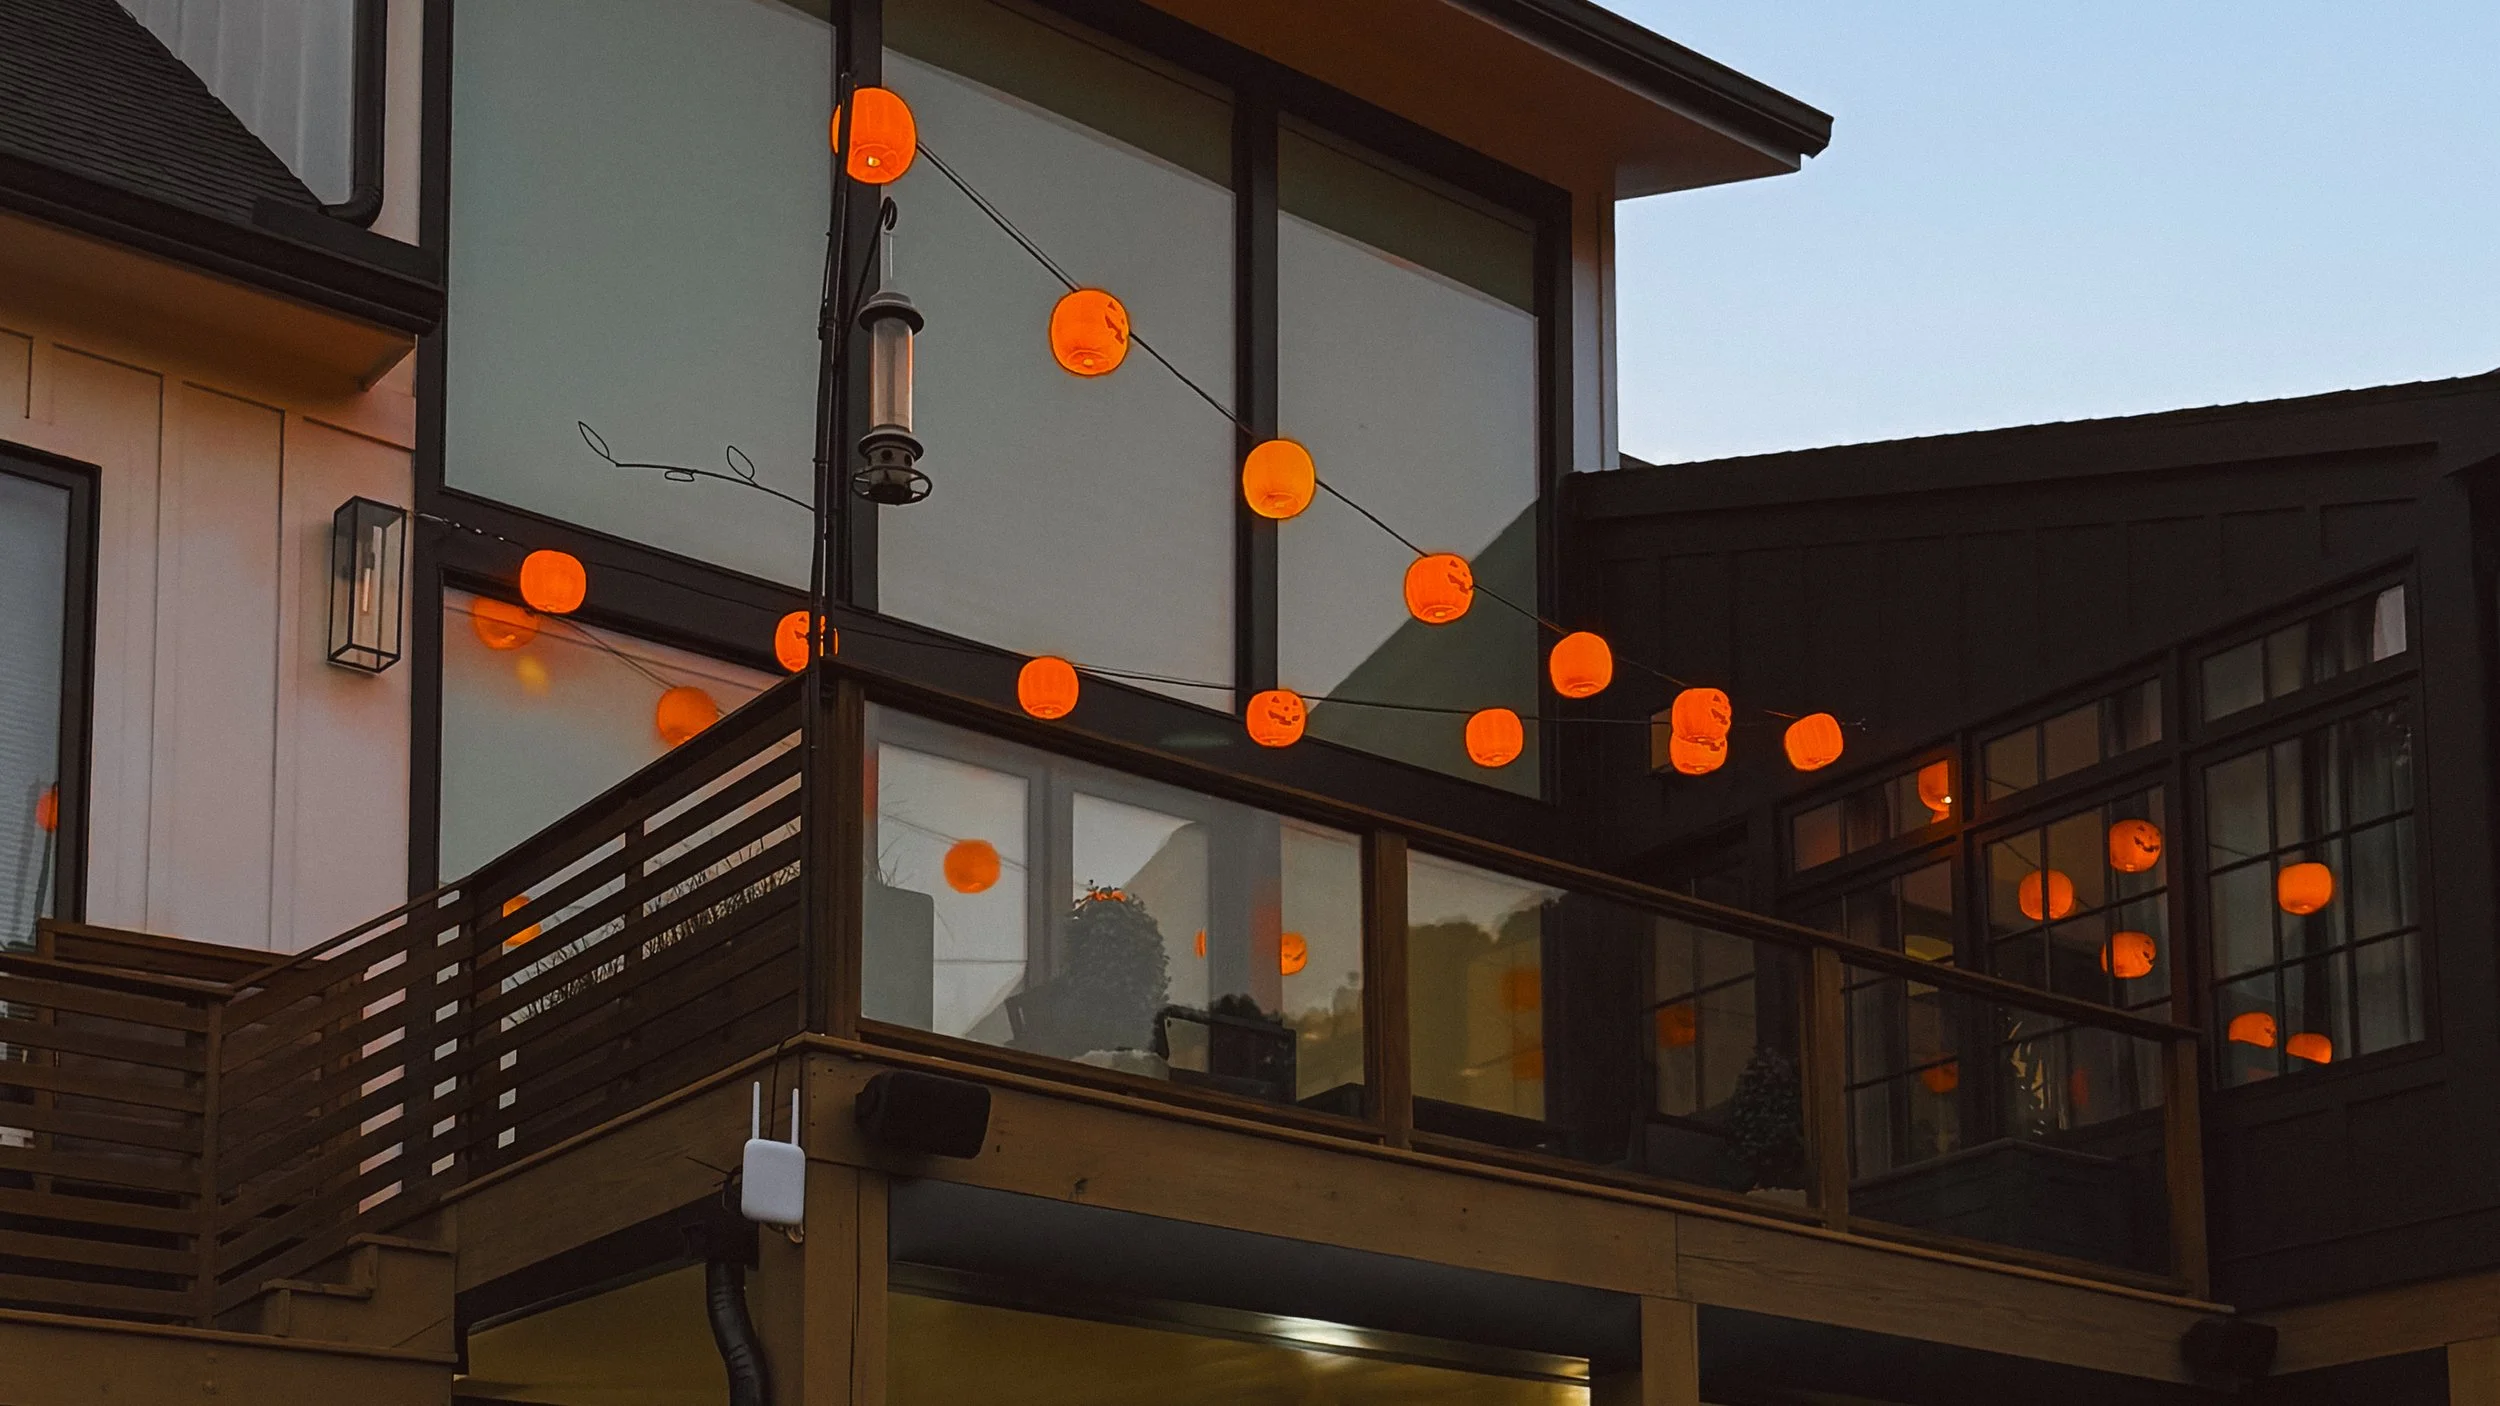
If you’re looking for a budget-friendly way to add some spooky charm to your outdoor Halloween setup, this DIY is for you. With just a few tools and those classic plastic Jack-o’-Lantern trick-or-treat pails, you can turn an ordinary set of string lights into a glowing row of pumpkin lanterns.
What You’ll Need
A box (for easy cleanup)
Step-by-Step Instructions
Step 1: Peel off any stickers from the bottom of the Jack-o’-Lanterns.
Step 2: Use your cutting pliers to carefully snip off the plastic handles. This will leave two small holes on the sides of each pumpkin that you’ll use later.
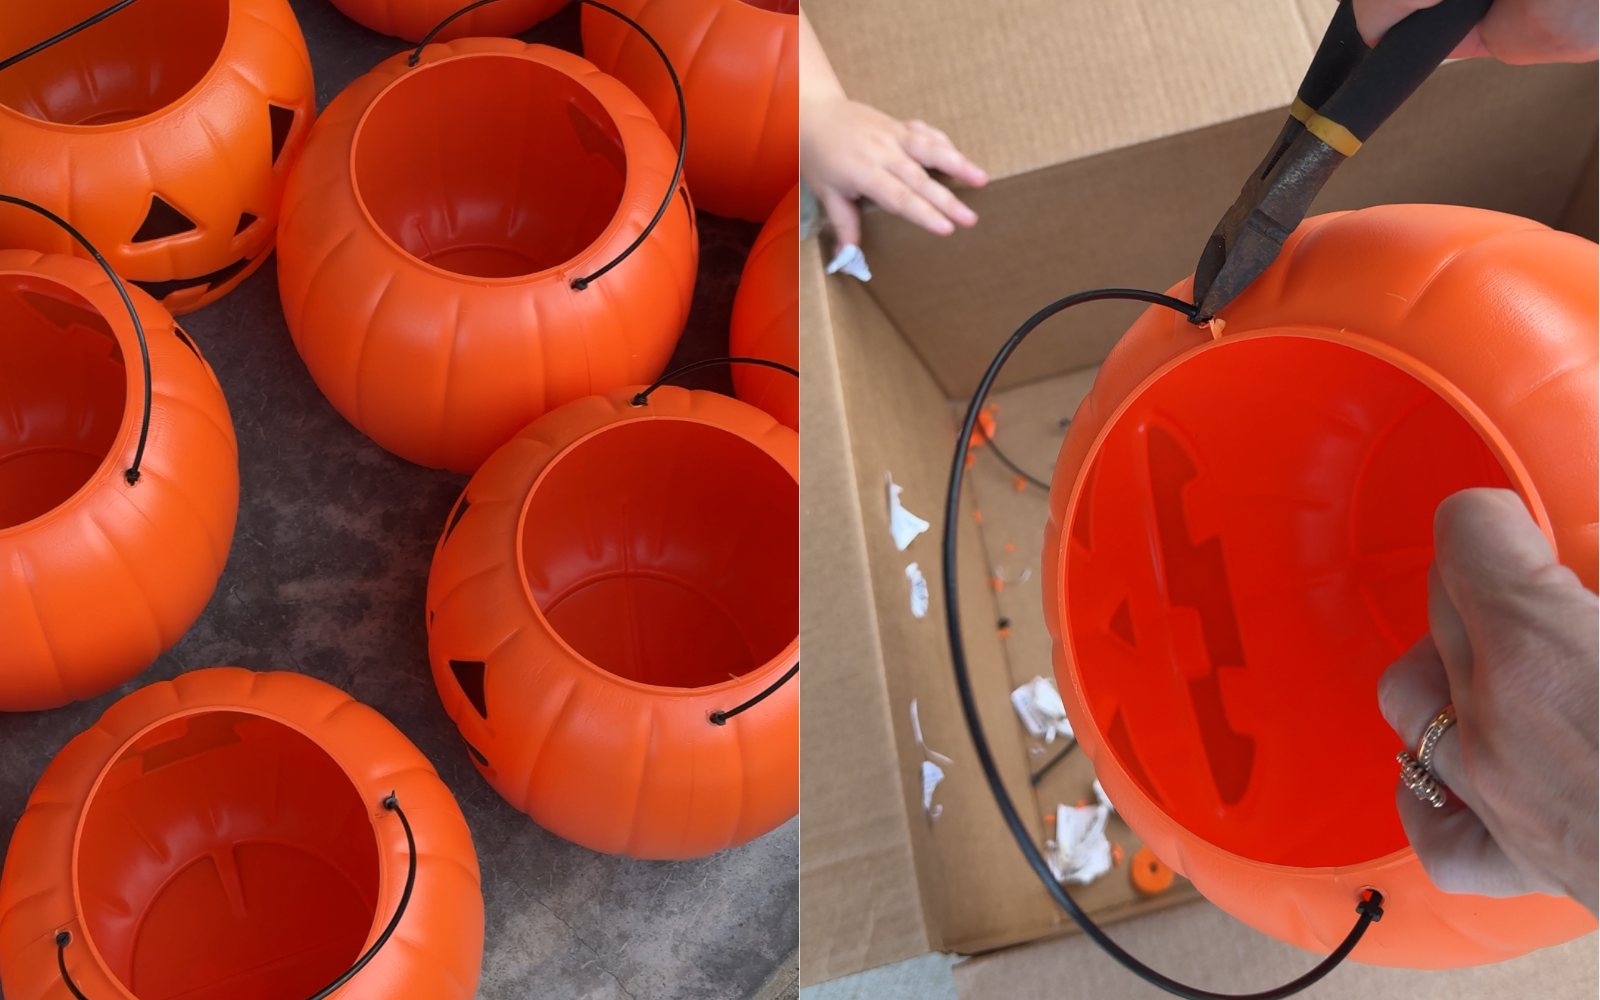
Step 3: Drill Drainage Holes. Using a 1 1/8" spade drill bit, drill a hole in the bottom center of each pail. This allows rainwater to pass through if your lights are outdoors.
💡 Pro Tip: Place the pumpkins over a box while drilling, removing stickers and cutting off handles so all the pieces and plastic shavings fall inside. It makes for an easy clean up!

Step 4: Feed a zip tie through each handle hole of each pumpkin. These will secure the pumpkins to your string lights.
Step 5: Attach to the Lights. Place each Jack-o’-Lantern over a bulb on your string lights. Once it’s centered, tighten the zip ties around the wire so the pumpkin stays in place. I alternated the faces so I could see them from both my living room and back yard.
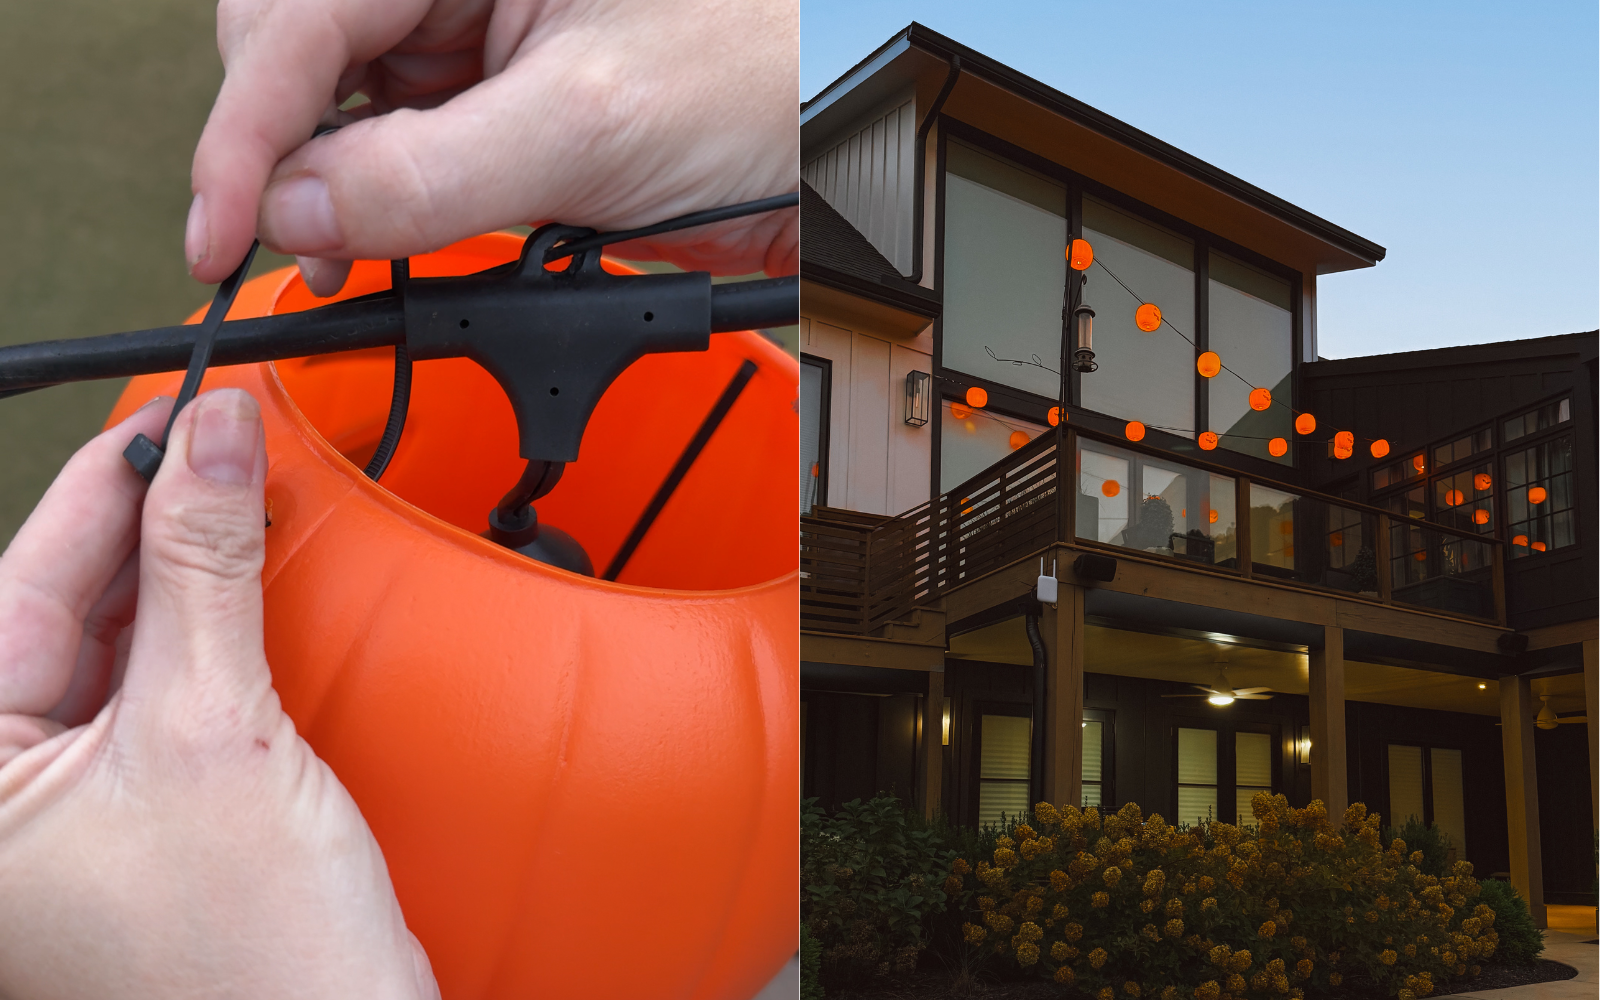
Step 6: Snip Off the Extra. Use your cutting pliers to trim off the excess zip tie for a clean finish.
And that’s it! You’ve got yourself a glowing line of cheerful (or spooky!) Jack-o’-Lantern lights perfect for Halloween.
If you liked this, you might enjoy reading about my DIY floral ice cubes!

Vintage-Inspired Finds From Target
We all love the vintage look, and while I’m always thrilled when I score a true vintage piece, sometimes it’s just not realistic. Maybe the right item is impossible to find, maybe it’s out of budget, or maybe it needs way more repair work than I have time for. That’s when vintage-inspired pieces step in and save the day.
I’ve pulled together some of my favorite vintage-inspired finds from Target that bring in all the charm without the endless searching. Think brass details, beautiful rugs, and artwork that feels like it’s been collected over time. I’m especially drawn to pieces with little touches that make them feel like they have history, even though they’re brand new.
These work perfectly on their own, but they also mix so easily with actual vintage pieces you might already have at home. You get the character and warmth you want, without hours of antique store hopping or worrying about whether something is in usable condition.
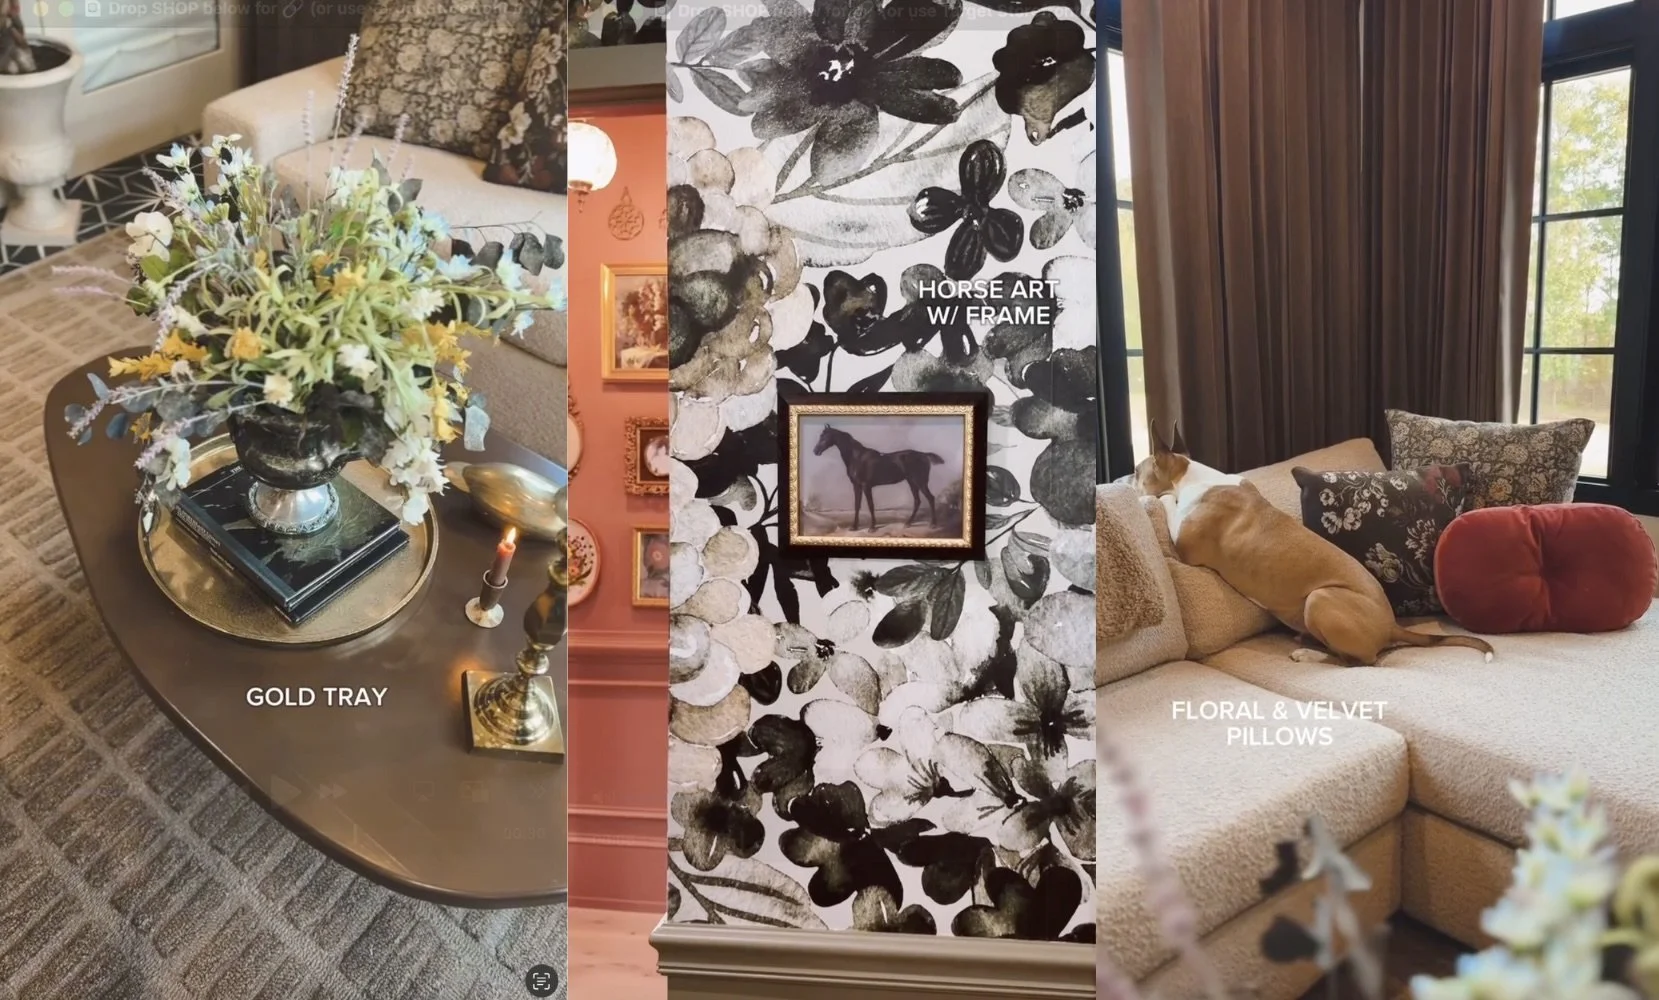
These pieces have so many little details that nod to vintage style. The skirted chairs feel like something you’d see in an old country house, with their soft lines and tailored fabric. The twisted wood legs on the console and armchair add that handcrafted feel you can’t help but notice. Even the arched shelving has a shape that feels classic, like it’s been around for decades. Each piece has a timeless quality, but still works perfectly in a modern home.

These vintage-inspired pillows from Target bring in so much charm through their patterns, textures, and colors. There’s everything from warm plaid and embroidered florals to soft solids with contrast piping. I love the mix of shapes too, with classic squares, long lumbars, and even a round ruffled style. They’re the kind of pieces that make a sofa, chair, or bed feel layered and collected without needing to hunt down perfect vintage textiles.

These Target finds bring in so many vintage-inspired touches, from ornate picture frames and floral artwork to warm brass accents. The mix of materials really stands out here, from marble, wicker, glass, and metal all working together to create that layered, collected feel. The floral rug adds instant character to any space, while the sculptural lamps, bookends, and trays make even the smallest corners feel thoughtfully styled. Each piece has a little nod to the past, but they’re brand new and ready to use right away.

Bringing vintage charm into your home doesn’t have to mean scouring flea markets or waiting for the perfect piece to appear. Mixing in well-made, vintage-inspired finds can give you the same warmth and character, while still being functional for everyday life. Whether it’s a piece of furniture with classic detailing, a rug that feels like it has a story, or small accents that look lovingly collected, these touches can make your space feel inviting and uniquely yours.
IF YOU ENJOYED THIS POST, YOU MIGHT BE INTERESTED IN my Vintage-Inspired finds from amazon!
FOLLOW ME ON MY SOCIALS!
My Baseboards
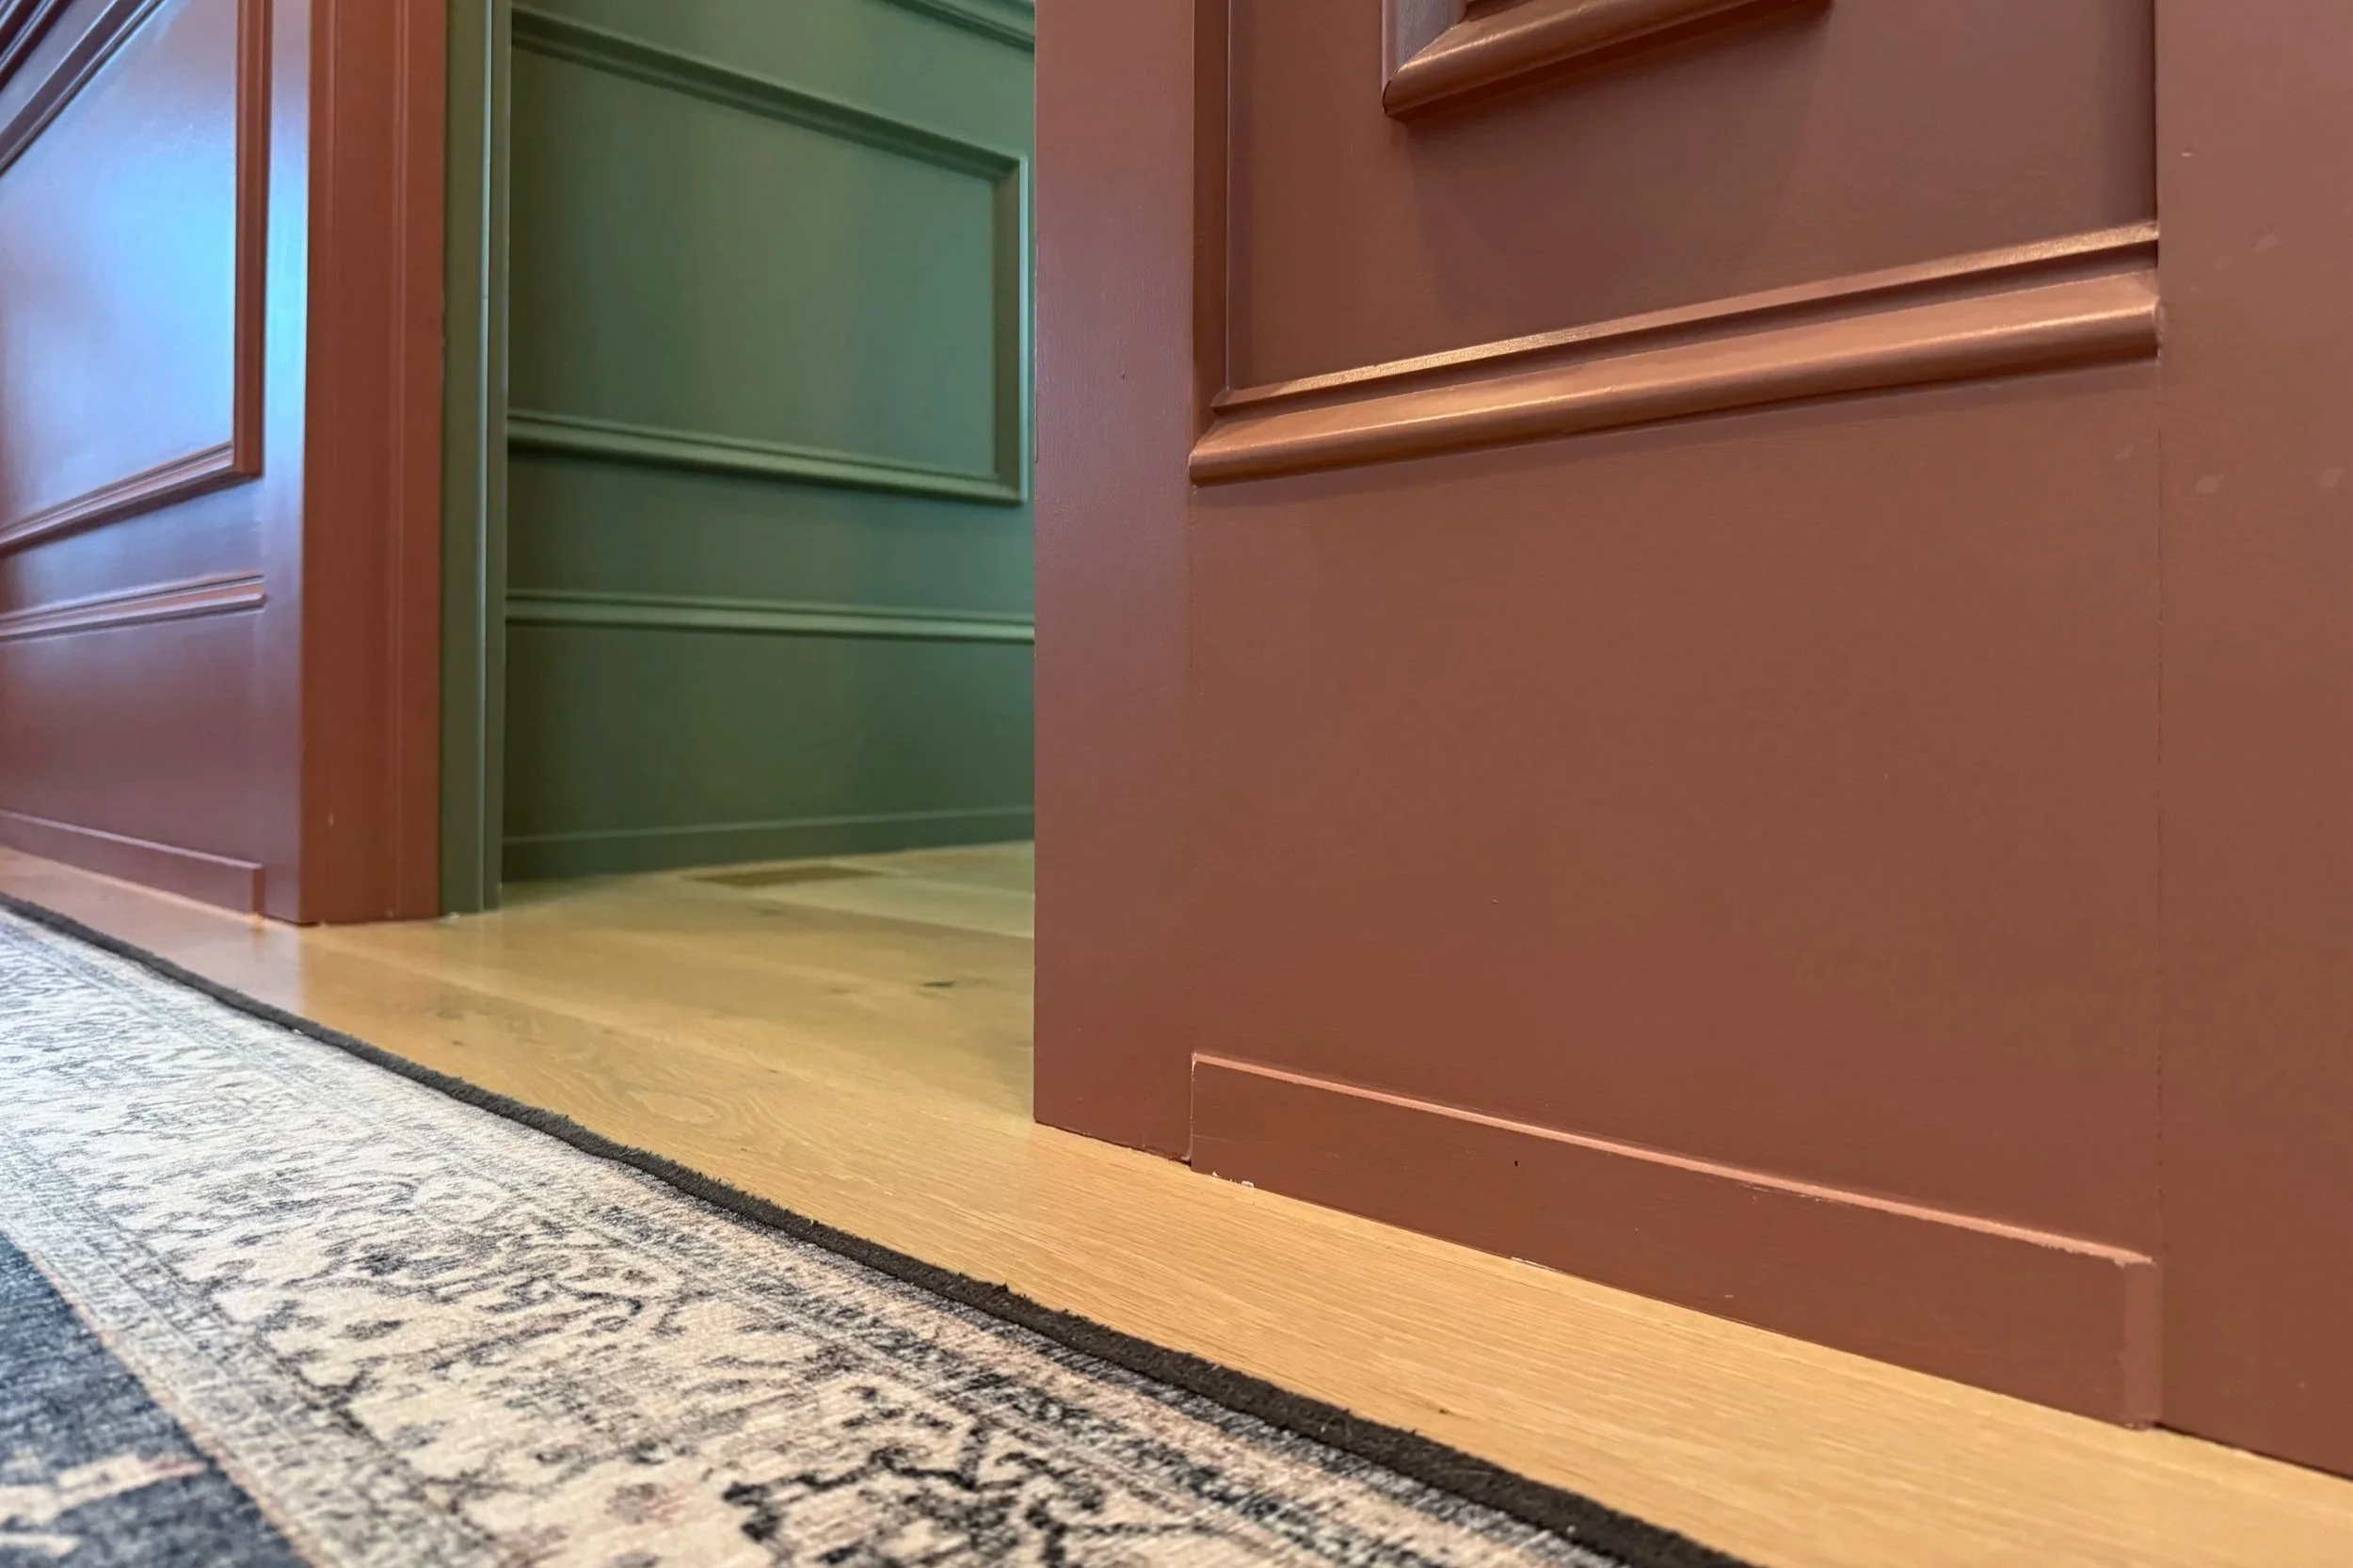
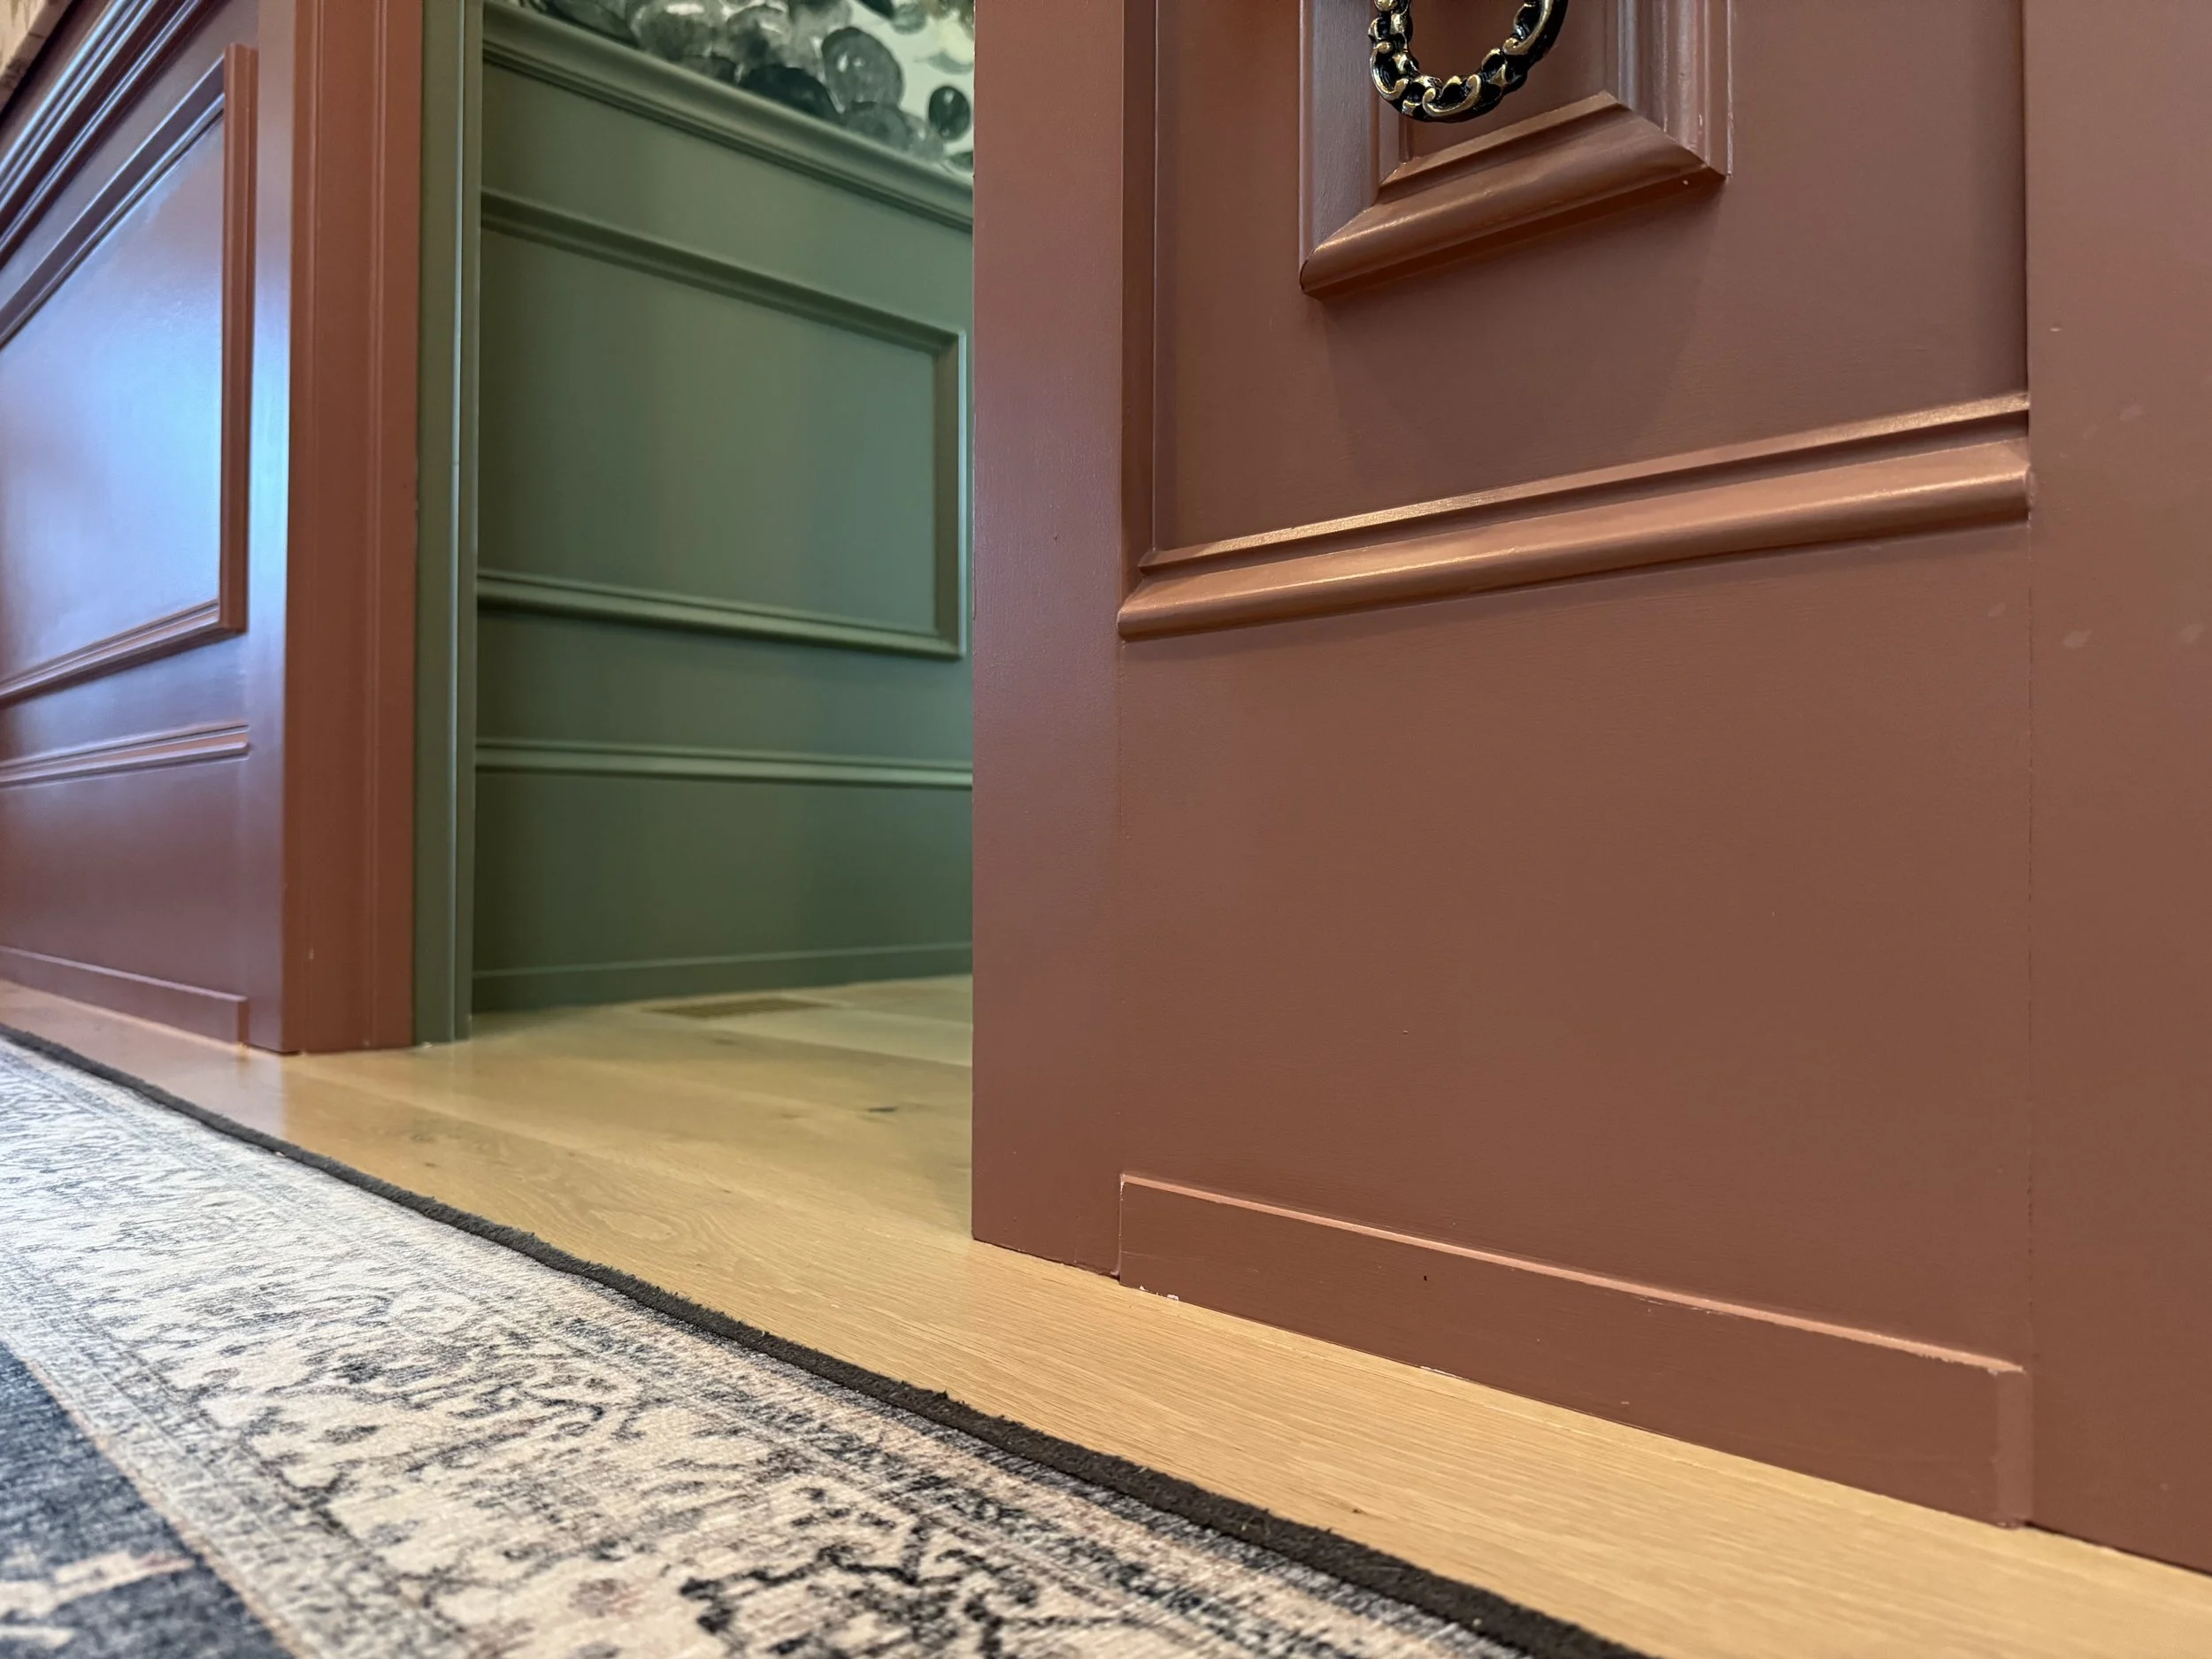
I get asked about our baseboards all the time, so here’s a quick breakdown of what we did!
The main piece is 9 1/4” tall x 3/4" thick baseboard moulding.
The top detail is called base cap, and it gives it that more custom, layered look.
In rooms with hardwood floors, we also added 1 1/2” tall 1/4” thick shoe moulding at the bottom.
In rooms with tile, we skipped the shoe moulding and just did the baseboard + base cap combo.
We don’t have carpet anywhere, so I don’t have an example of that, sorry!
It’s one of those small details that really makes the whole space feel more finished.

IF YOU ENJOYED THIS POST, YOU MIGHT BE INTERESTED IN my Crown moulding tutorial!
FOLLOW ME ON MY SOCIALS!
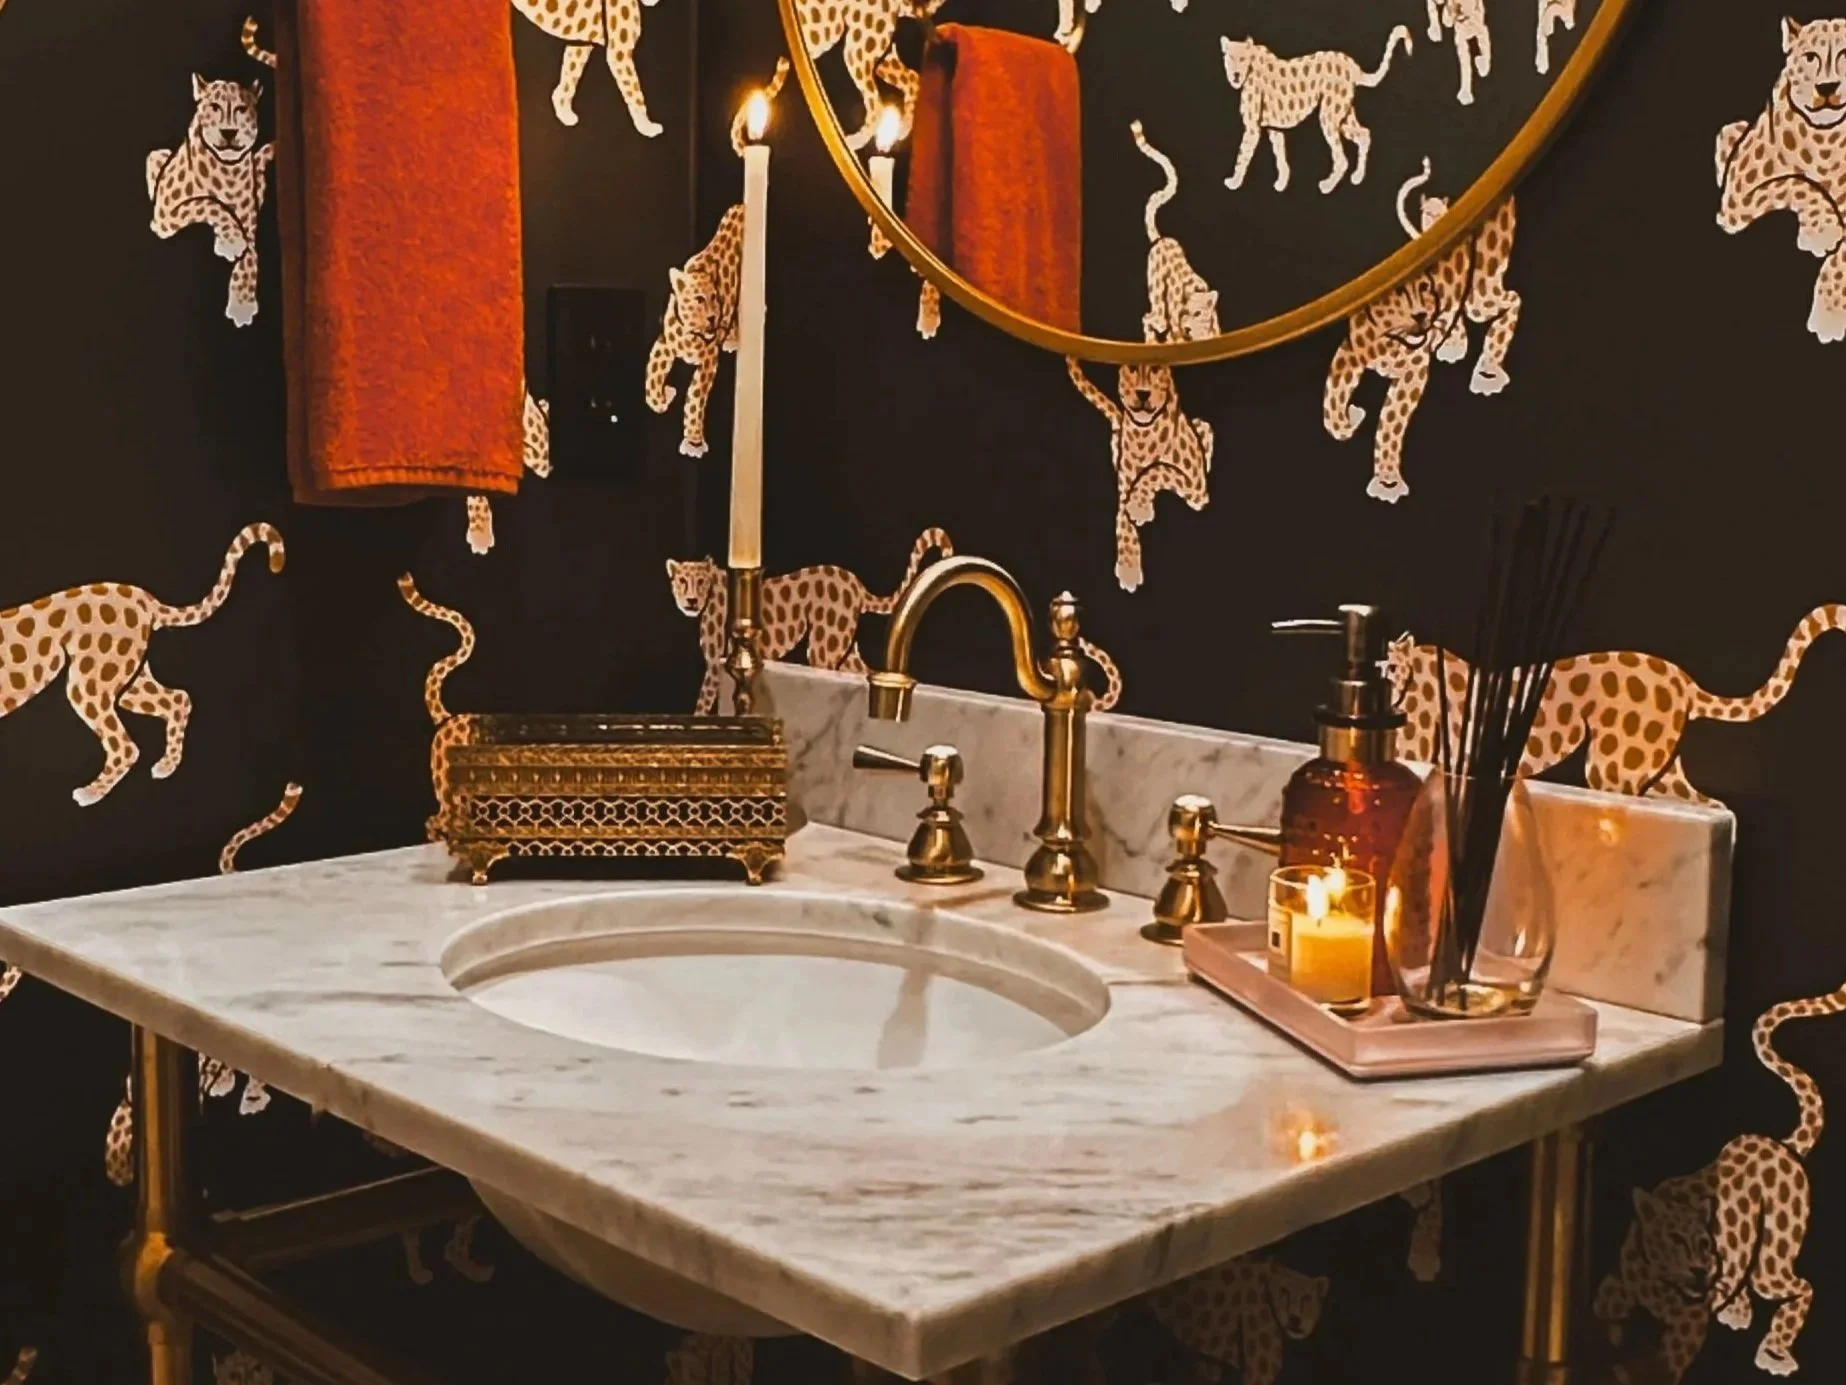
How I Replaced My Can Lights with Gorgeous Pendants

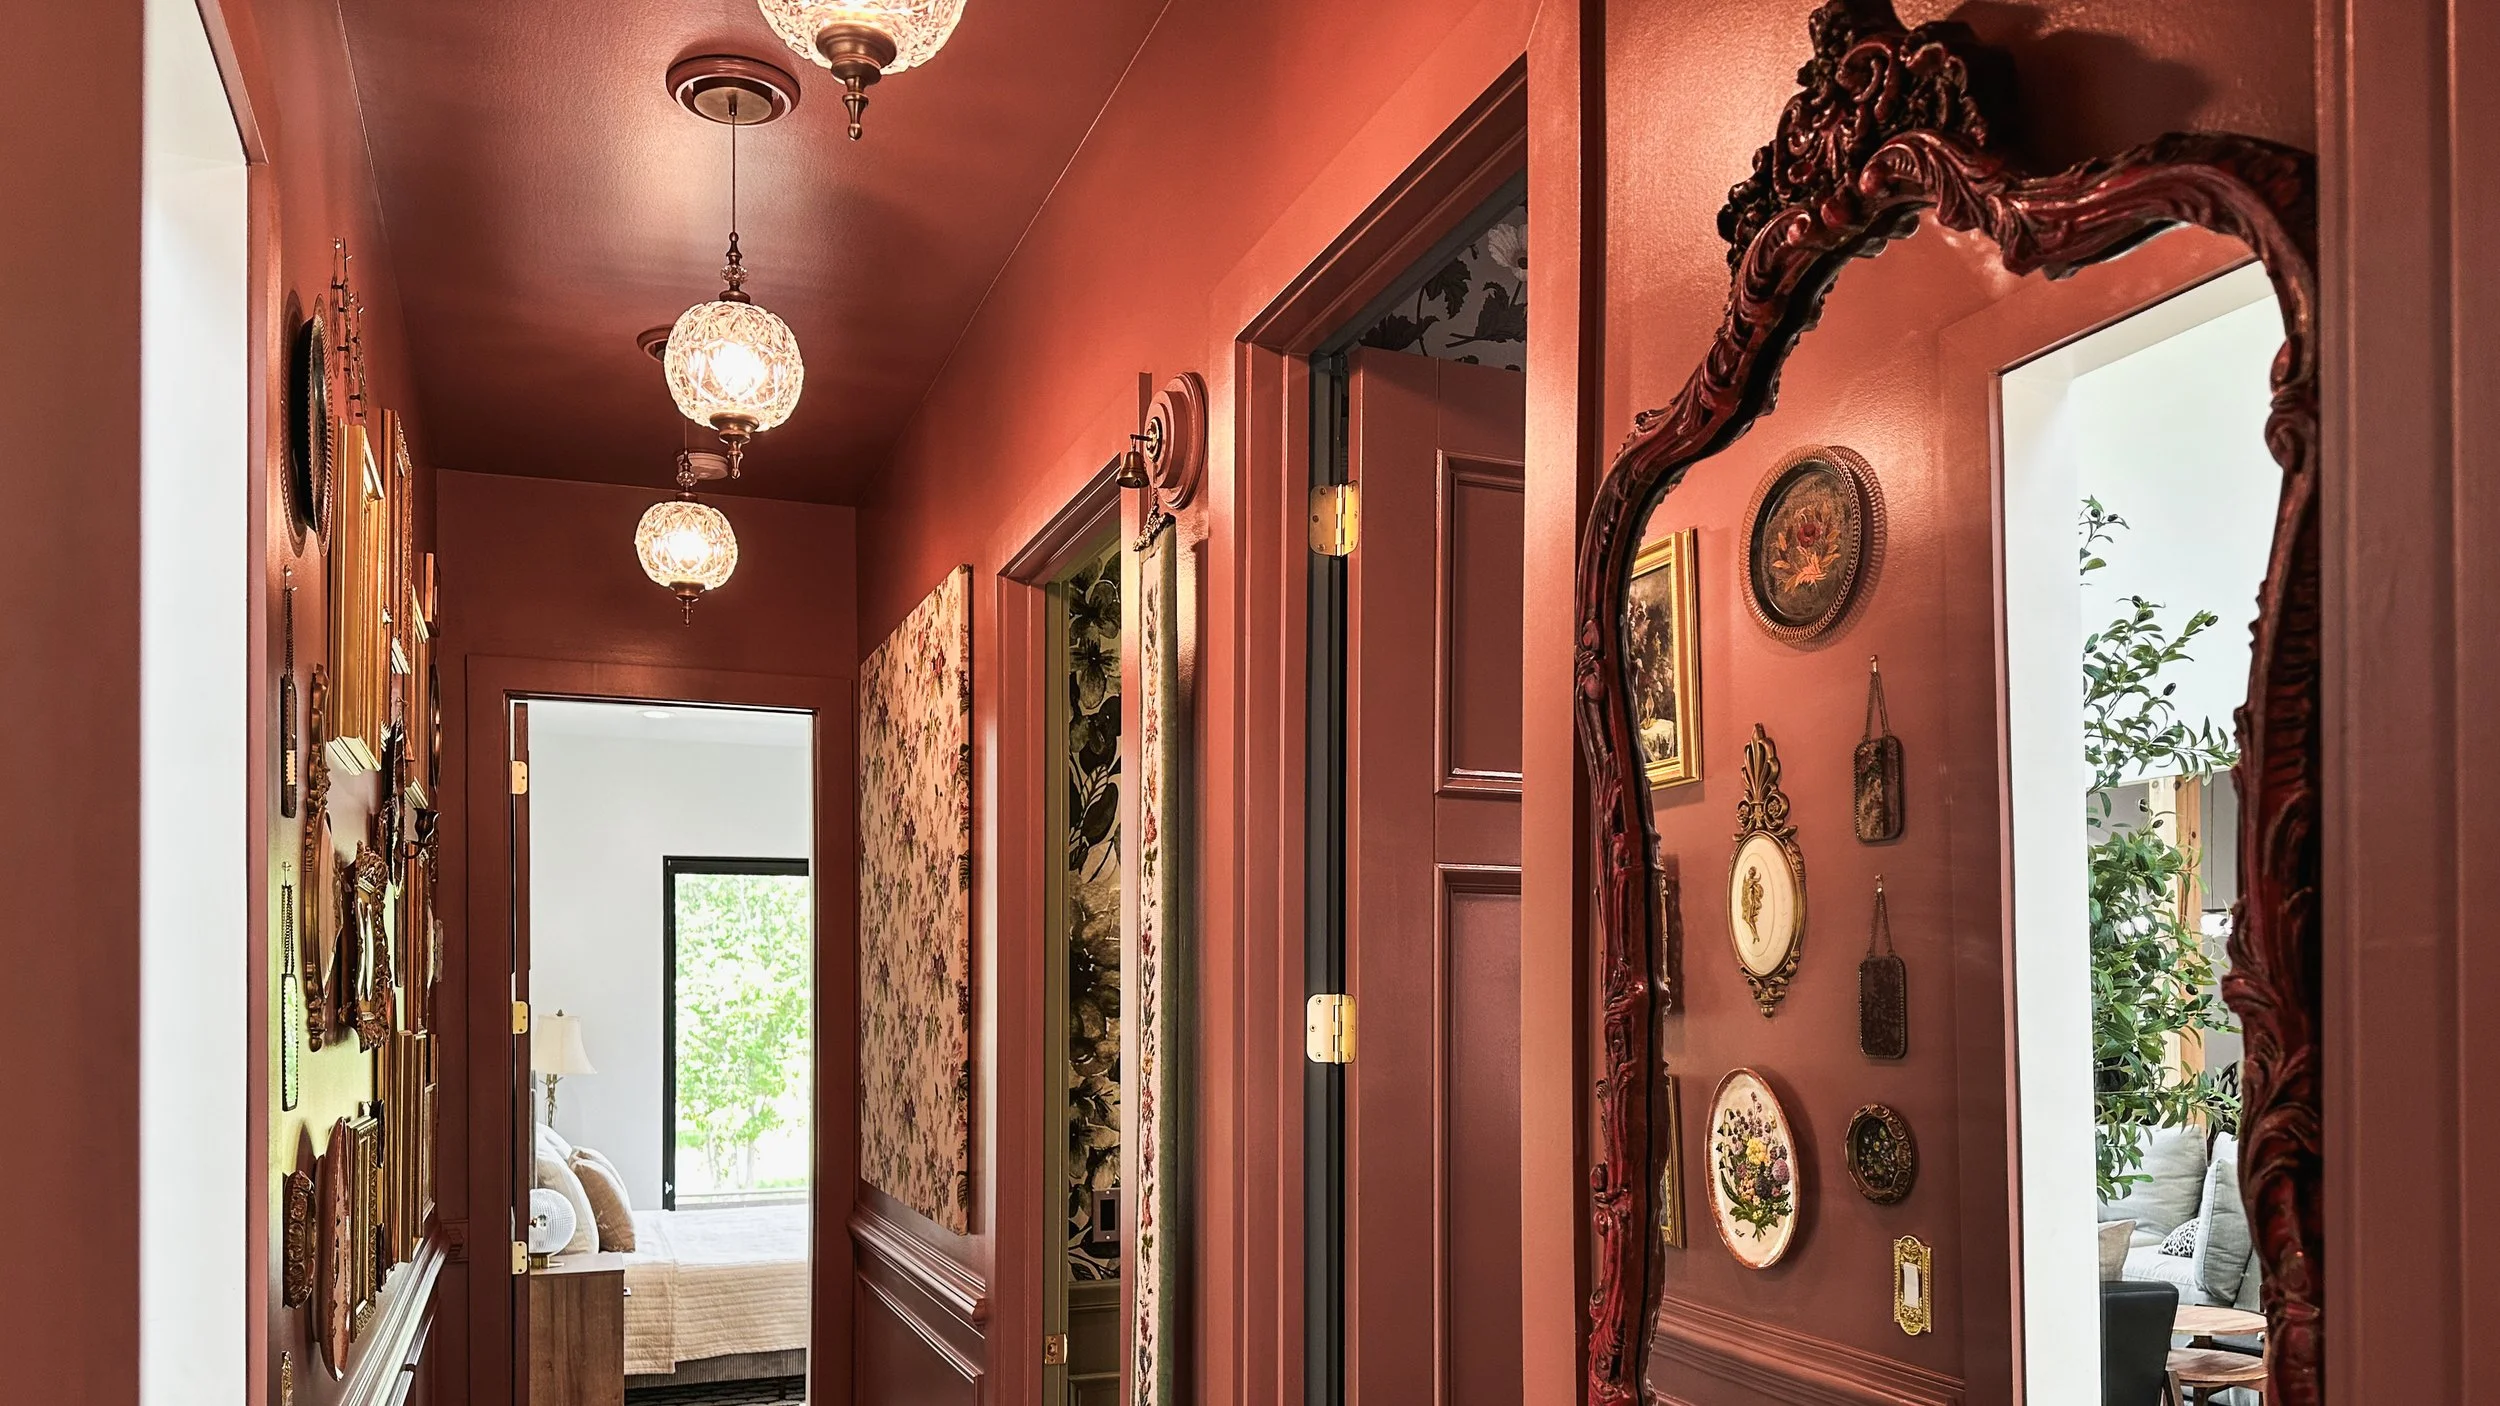
Our hallway had those standard can lights that are totally functional, but kind of boring. I knew I really wanted something for that space that had a little more charm and personality, so I swapped out our can lights for these gorgeous Amazon pendants. Honestly, it completely transformed the look of the hallway.
The best part? I didn’t have to rewire anything or hire an electrician. I just used this can light converter kit and we did it ourselves Seriously, it’s a total game-changer for renters or anyone who doesn’t want to do major electrical work. We just did it again in our bathroom makeover so I filmed my husband and wrote down exact step by step instructions for you!
Here’s how it works:
Turn off the power at the breaker.
Remove the can light trim (ours are just two wires that you squeeze together to release)
Unscrew the can light from the ceiling (similar to a light bulb)

4. Open the converter kit and separate the metal bracket pieces that are screwed together. You will need the expandable bracket first.
5. Expand it to the side of your hole in the ceiling. Tighten the middle screw to lock in the adjusted size and screw the two side screw into the actual can light hole.
6. Now you’ll need the other metal piece. Using two screws from the kit, it will screw directly into the adjustable bracket.

7. The green wire hanging down is the ground wire. Using the flat head screw driver, loosen the screw. Attach it to a metal piece inside the can light hole and screw it tight to secure it. Tuck the wire out of the way.


8. Put the metal cover up by lining up the two spaces and twisting it in place.
9. Now screw in the piece that looks like the bottom of a light bulb with a black and white wire attached.
10. If needed, install the ceiling medallion to cover the metal plate (optional) or use the small ceiling medallion it comes with (like I did in my hallway!)
11. Now you can install your pendant light! Follow the directions for your specific light fixture.


It’s such a simple project, but it made a huge difference. The pendants bring in so much more style than the old can lights ever did, and now the hallway and bathroom feels more elevated.
If you’ve got recessed lights that could use a little personality, this is one of those quick wins that looks way more complicated than it actually is.
Links at a glance:
Paint in hallway: Reddened Earth by HGTV Home by Sherwin-Williams
Paint in bathroom: Virtual Taupe by HGTV Home by Sherwin Williams
Pendant Lights in hallway
IF YOU ENJOYED THIS POST, YOU MIGHT BE INTERESTED IN my Crown moulding tutorial!
FOLLOW ME ON MY SOCIALS!

My Favorite Vintage-Inspired Finds from Amazon
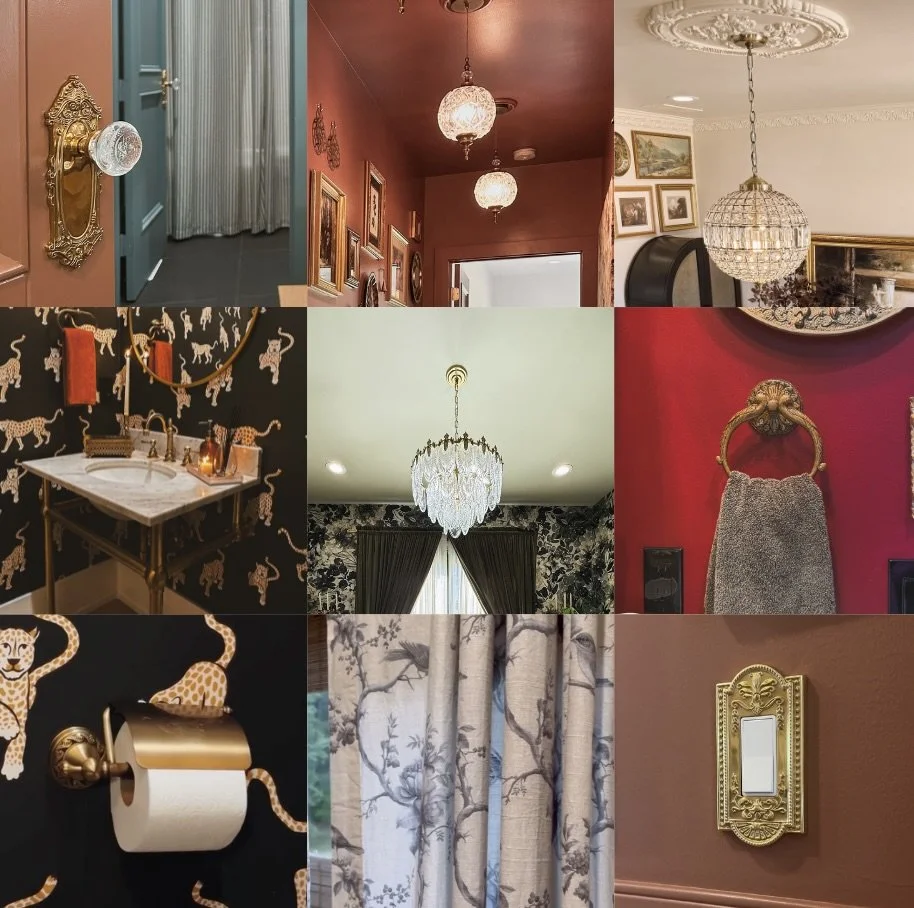
From charming hardware to timeless lighting, these pieces helped me bring that collected, vintage feel into every corner of our home. Don’t get me wrong, I love a good thrift or antique store hunt. There’s nothing better than finding a one-of-a-kind piece with some history to it, but sometimes, vintage just isn’t practical. Bathroom fixtures are especially tricky to source secondhand, and when you’re trying to make things feel cohesive (like matching doorknobs or coordinating hardware), true vintage can come up short. That’s where these vintage-inspired Amazon finds come in. They have the look and feel I love, but with the consistency and availability to actually work throughout an entire space.


IF YOU ENJOYED THIS POST, YOU MIGHT BE INTERESTED The vintage-inspired finds in my hallway!
FOLLOW ME ON MY SOCIALS!
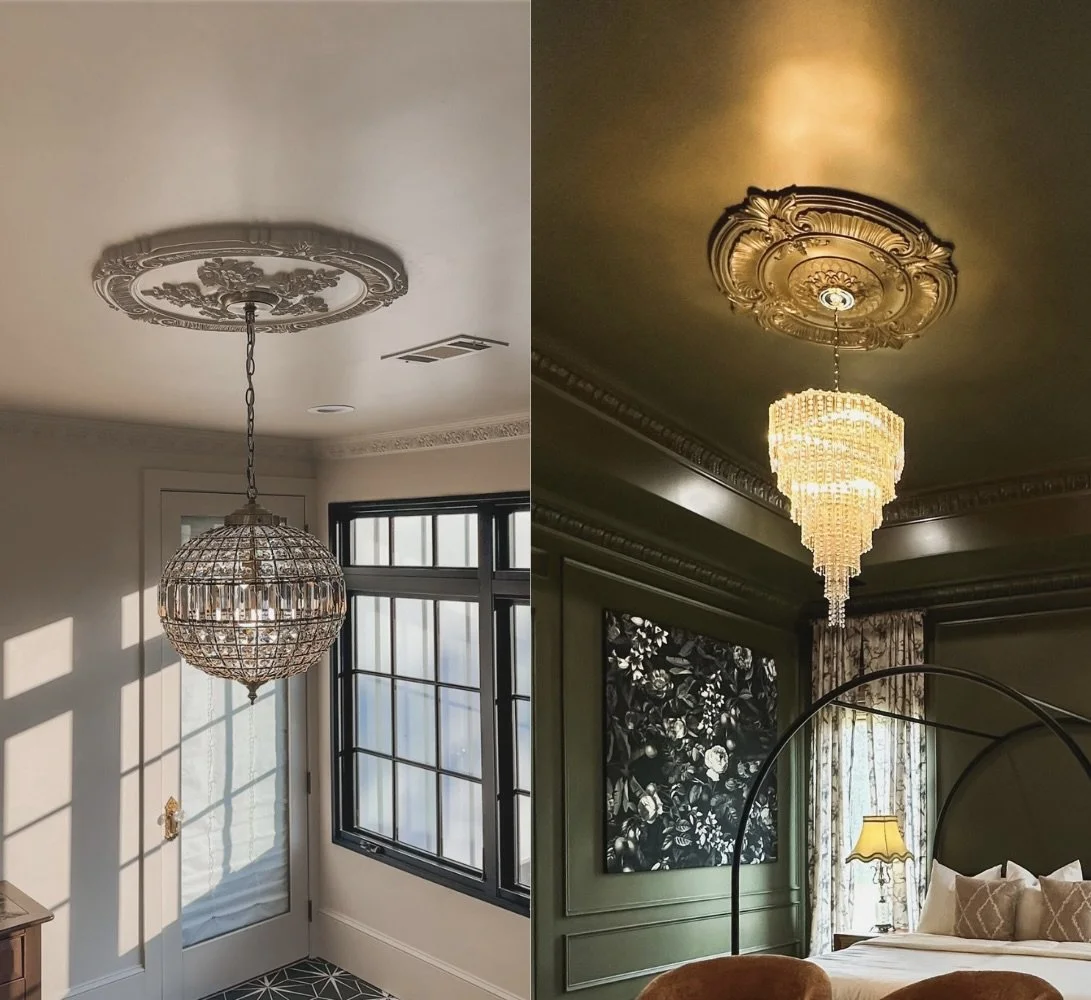
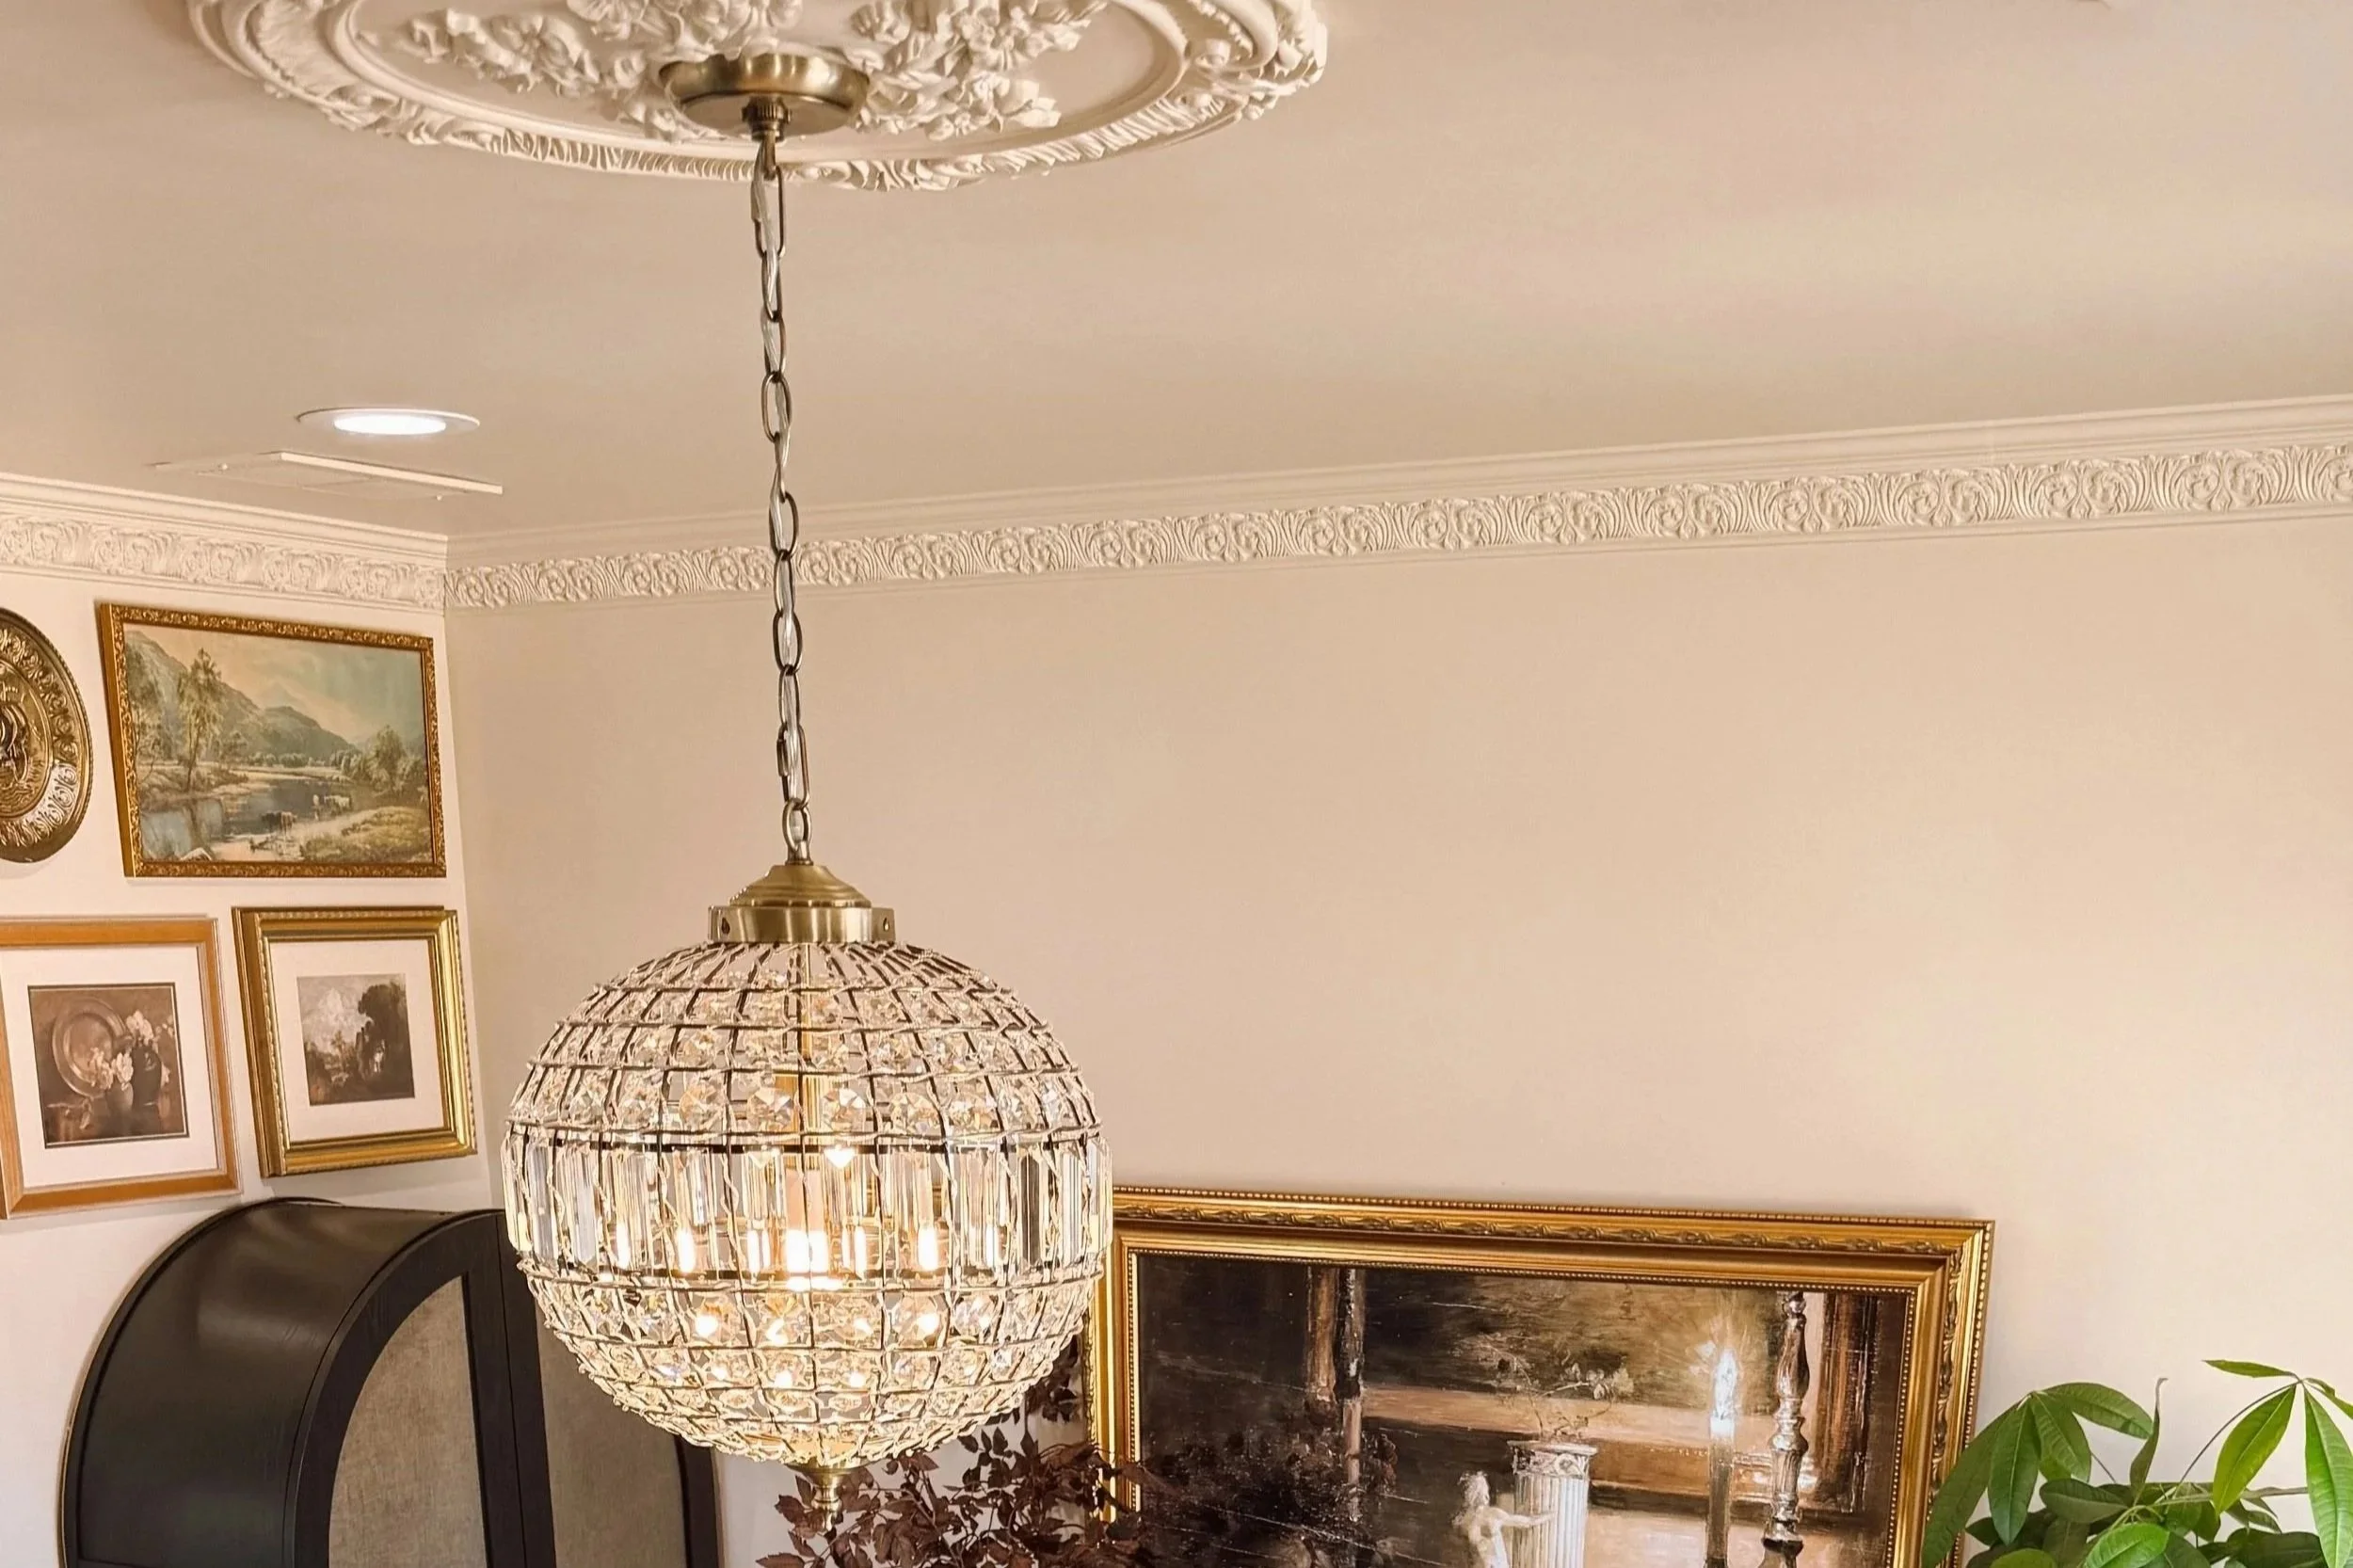
How to Install a Ceiling Medallion (By Yourself!)

Ceiling medallions are one of those little details that make a huge difference. They instantly add character and charm, and they’re surprisingly easy to install, even if you're doing it solo like I was. Here’s exactly how I installed mine, step by step:
What You’ll Need:
Pencil
Baby wipes (trust me)
paint of your choice
Your light fixture of choice (I’m using this chandelier!)
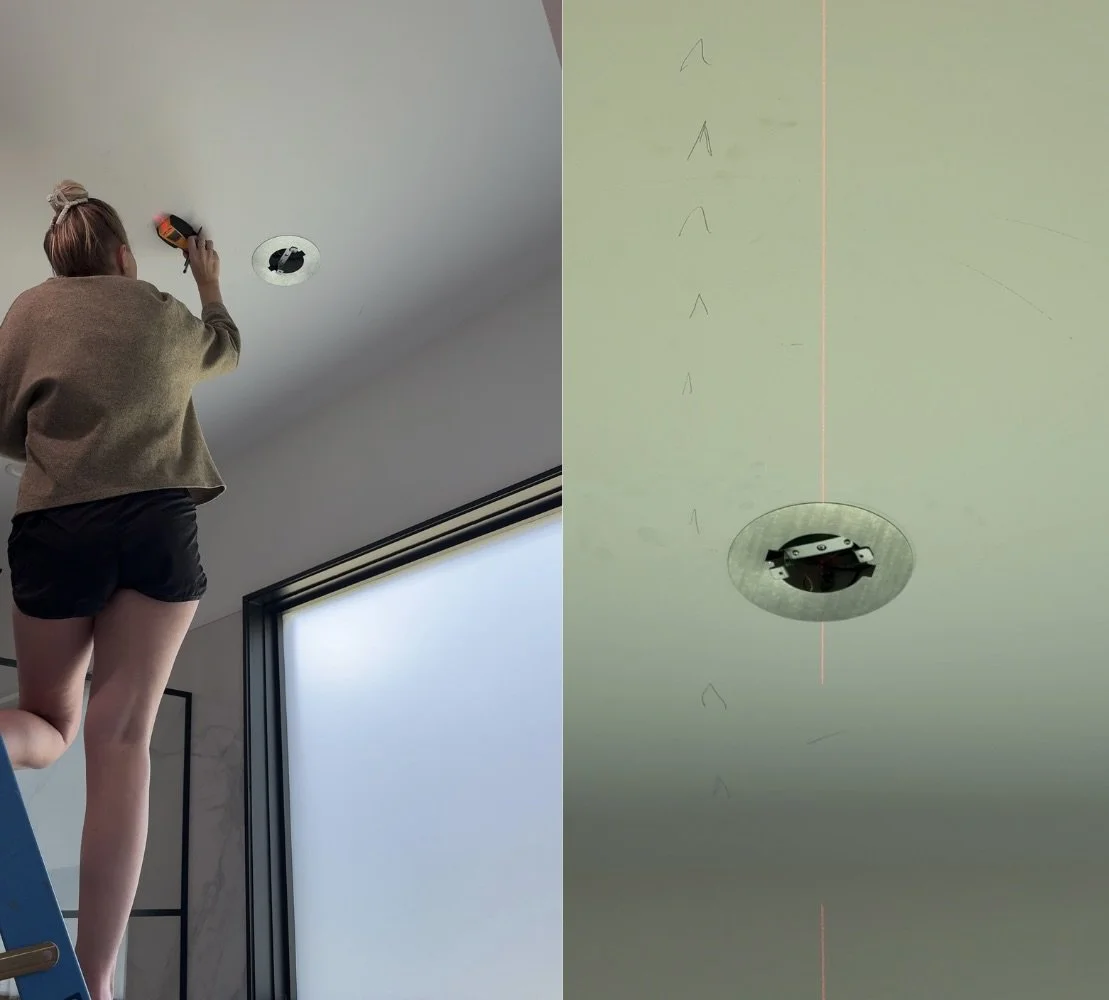
Step 1: Mark Your Studs
Use a stud finder to locate the ceiling joists and mark them lightly with a pencil. Mark this line beyond the circumference of your medallion so you can see the line once it's up on the ceiling. These are where you’ll want to secure your medallion for the most hold.
Step 2: Find Your Center
If you want to get fancy, a laser level will help you find the exact center of your ceiling. But honestly? When I’ve done this with help, I just had my husband stand on the floor while we eyeballed it. This time, I was alone, so I used a laser level to double-check myself.
Step 3: Add Your Adhesive
Flip your ceiling medallion over and add Liquid Nails or another heavy-duty construction adhesive to the back. Don’t be shy, this helps it really grip to the ceiling.
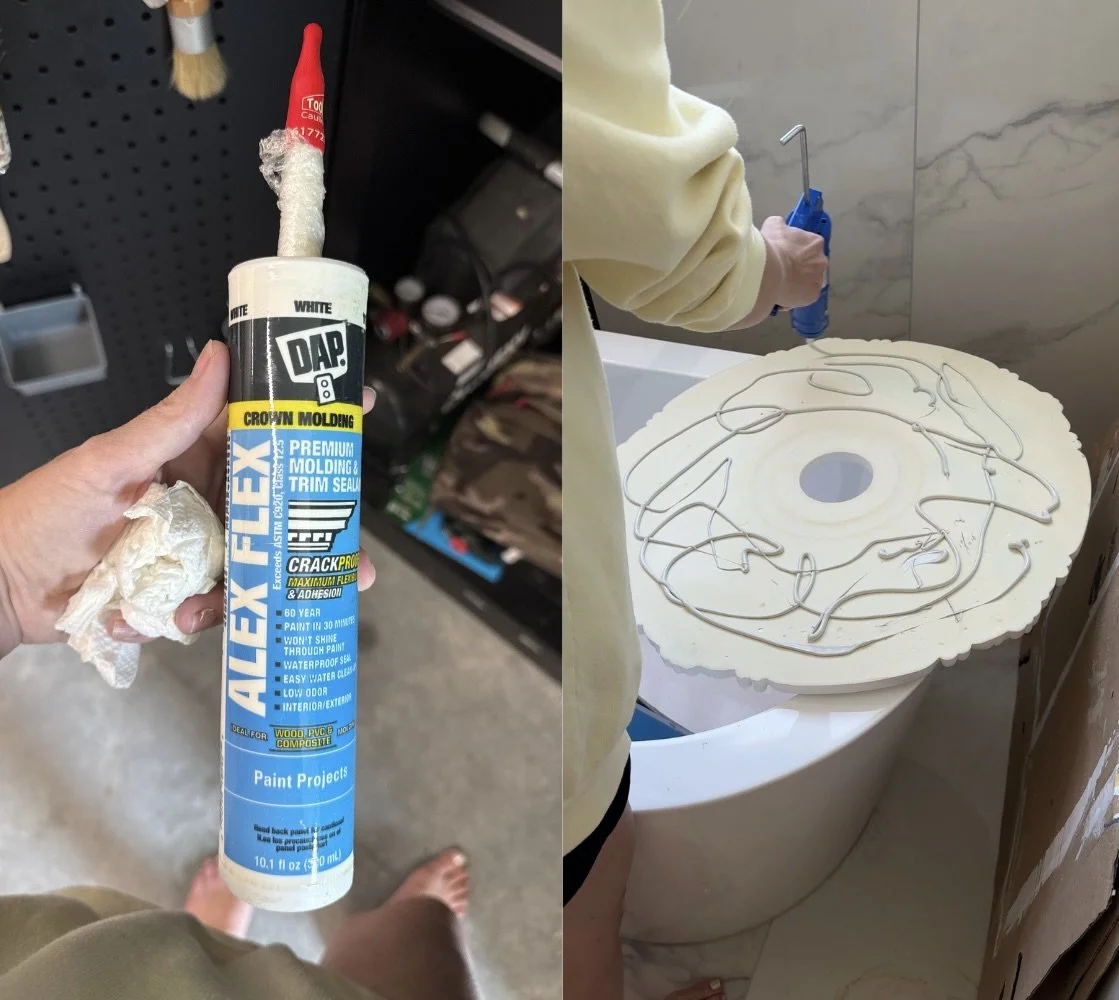
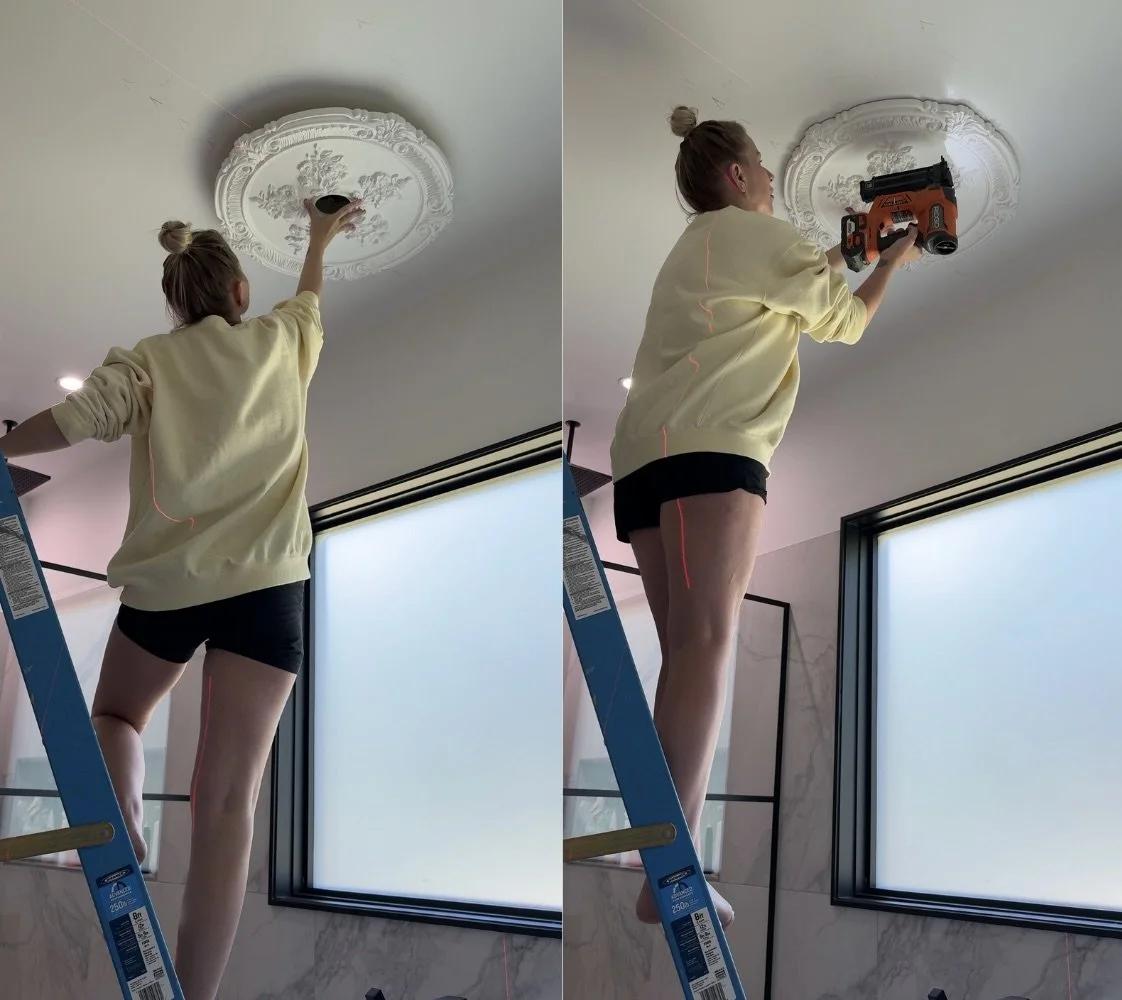
Step 4: Attach It to the Ceiling
Line it up with your center mark and press it onto the ceiling. While the adhesive sets, use a brad nailer with 2” nails to secure it. Start with the nails going directly into your marked studs, then add a few more around the edges to really anchor it in place.
Step 5: Fill the Nail Holes
Once it’s secure, go in with wood filler to cover the brad nail holes. Let the filler dry completely, then give those spots a quick sand to smooth them out.
Step 6: Caulk the Edges
Run a line of caulk around the seam where the medallion meets the ceiling to give it that polished, built-in look. Baby wipes are a total hack here. They make smoothing the caulk and cleaning up extra mess so easy.
That’s It!
Once everything’s dry, you can go ahead and paint it. Not a requirement, but I highly recommend a paint sprayer if you have one since ceiling medallions usually have a lot of pretty detailing. After that, you're ready to install your light fixture. I’ll be using this chandelier in my bathroom makeover and I can’t wait to see it all come together!
Links At A Glance
Ladder
IF YOU ENJOYED THIS POST, YOU MIGHT BE INTERESTED IN my Crown moulding tutorial!
FOLLOW ME ON MY SOCIALS!

Smart Storage for Kids’ Rooms

The Two Space-Savers That Totally Transformed My Daughter’s Room
I don’t know how kids manage to accumulate so much stuff, but somehow my daughter’s room was starting to feel like a toy explosion. Between the overflowing bookshelf and the mountain of stuffed animals, we were in desperate need of some smart storage that didn’t take up a ton of space.
Luckily, I found two absolute MVPs on Amazon that seriously changed the game:
Rotating bookshelf tower
Stuffed animal organizer (which we lovingly call “stuffed animal jail.)


Let’s start with the bookshelf. It’s compact, spins easily, and holds a ton without taking up more than a tiny footprint of floor space. We’ve got books on every side and even a few little knick-knacks she likes to keep displayed. She actually uses it now, too, because she can see and grab her books without everything toppling over. Win.
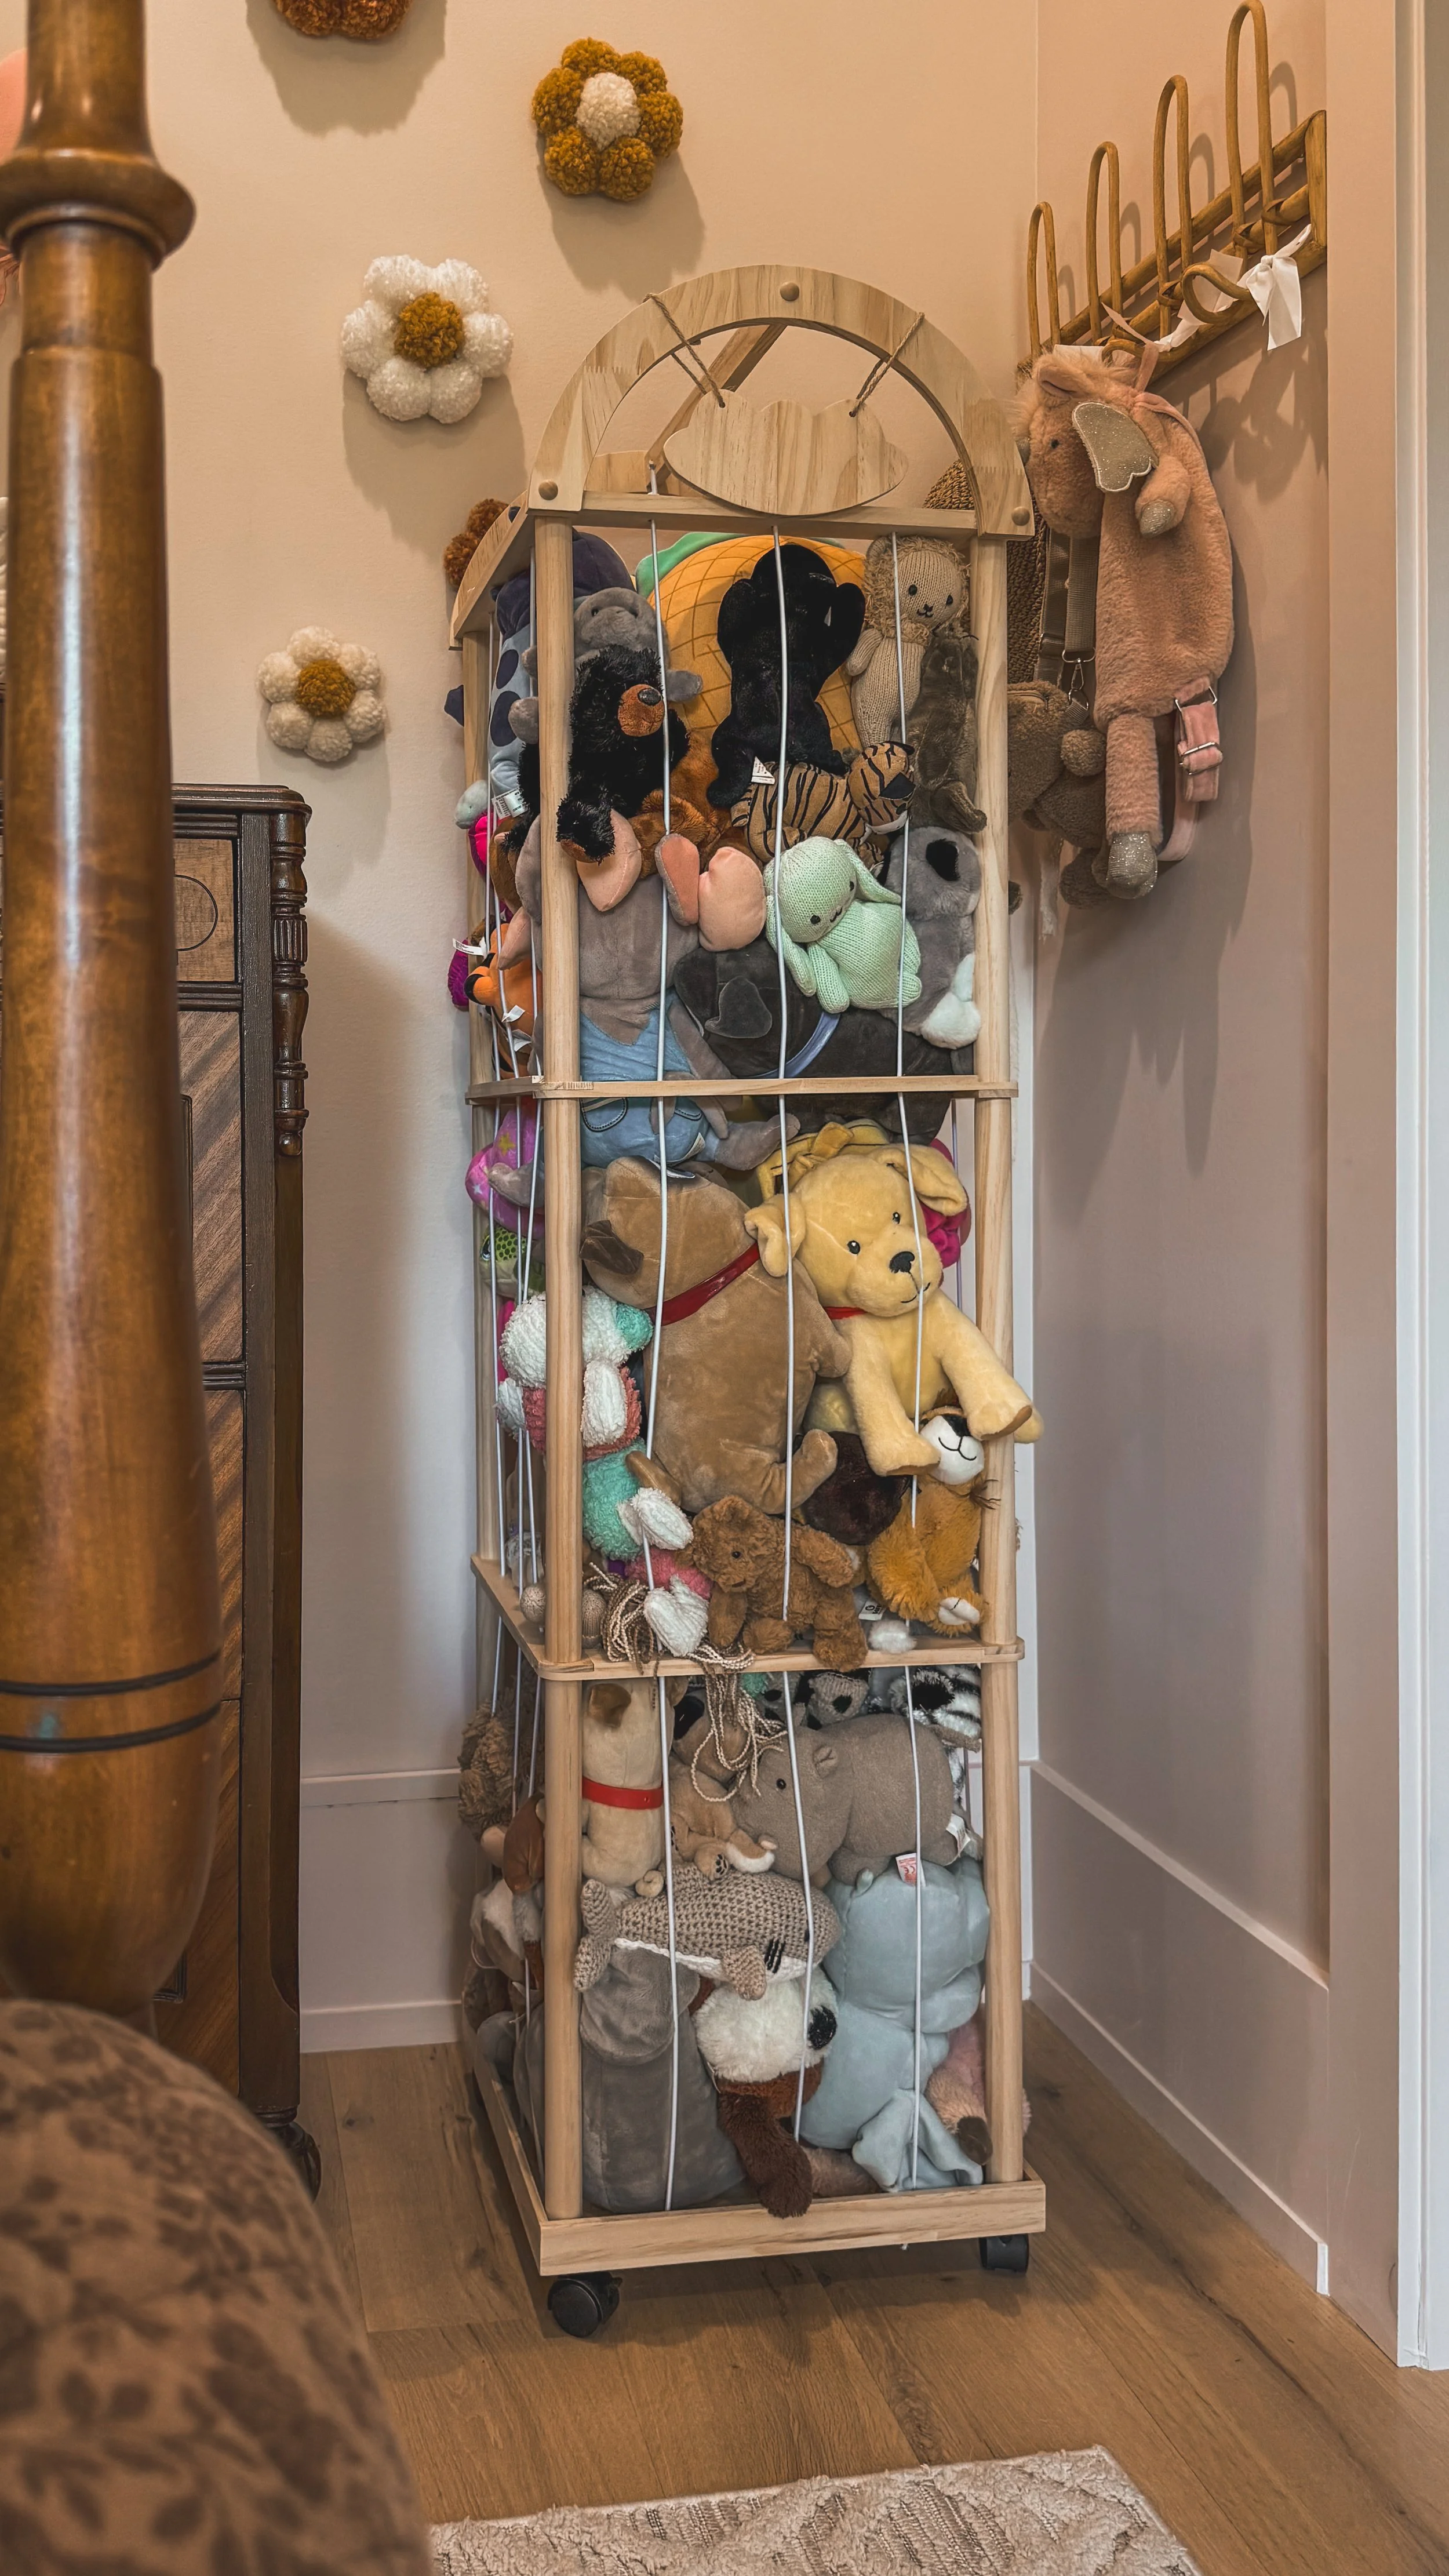
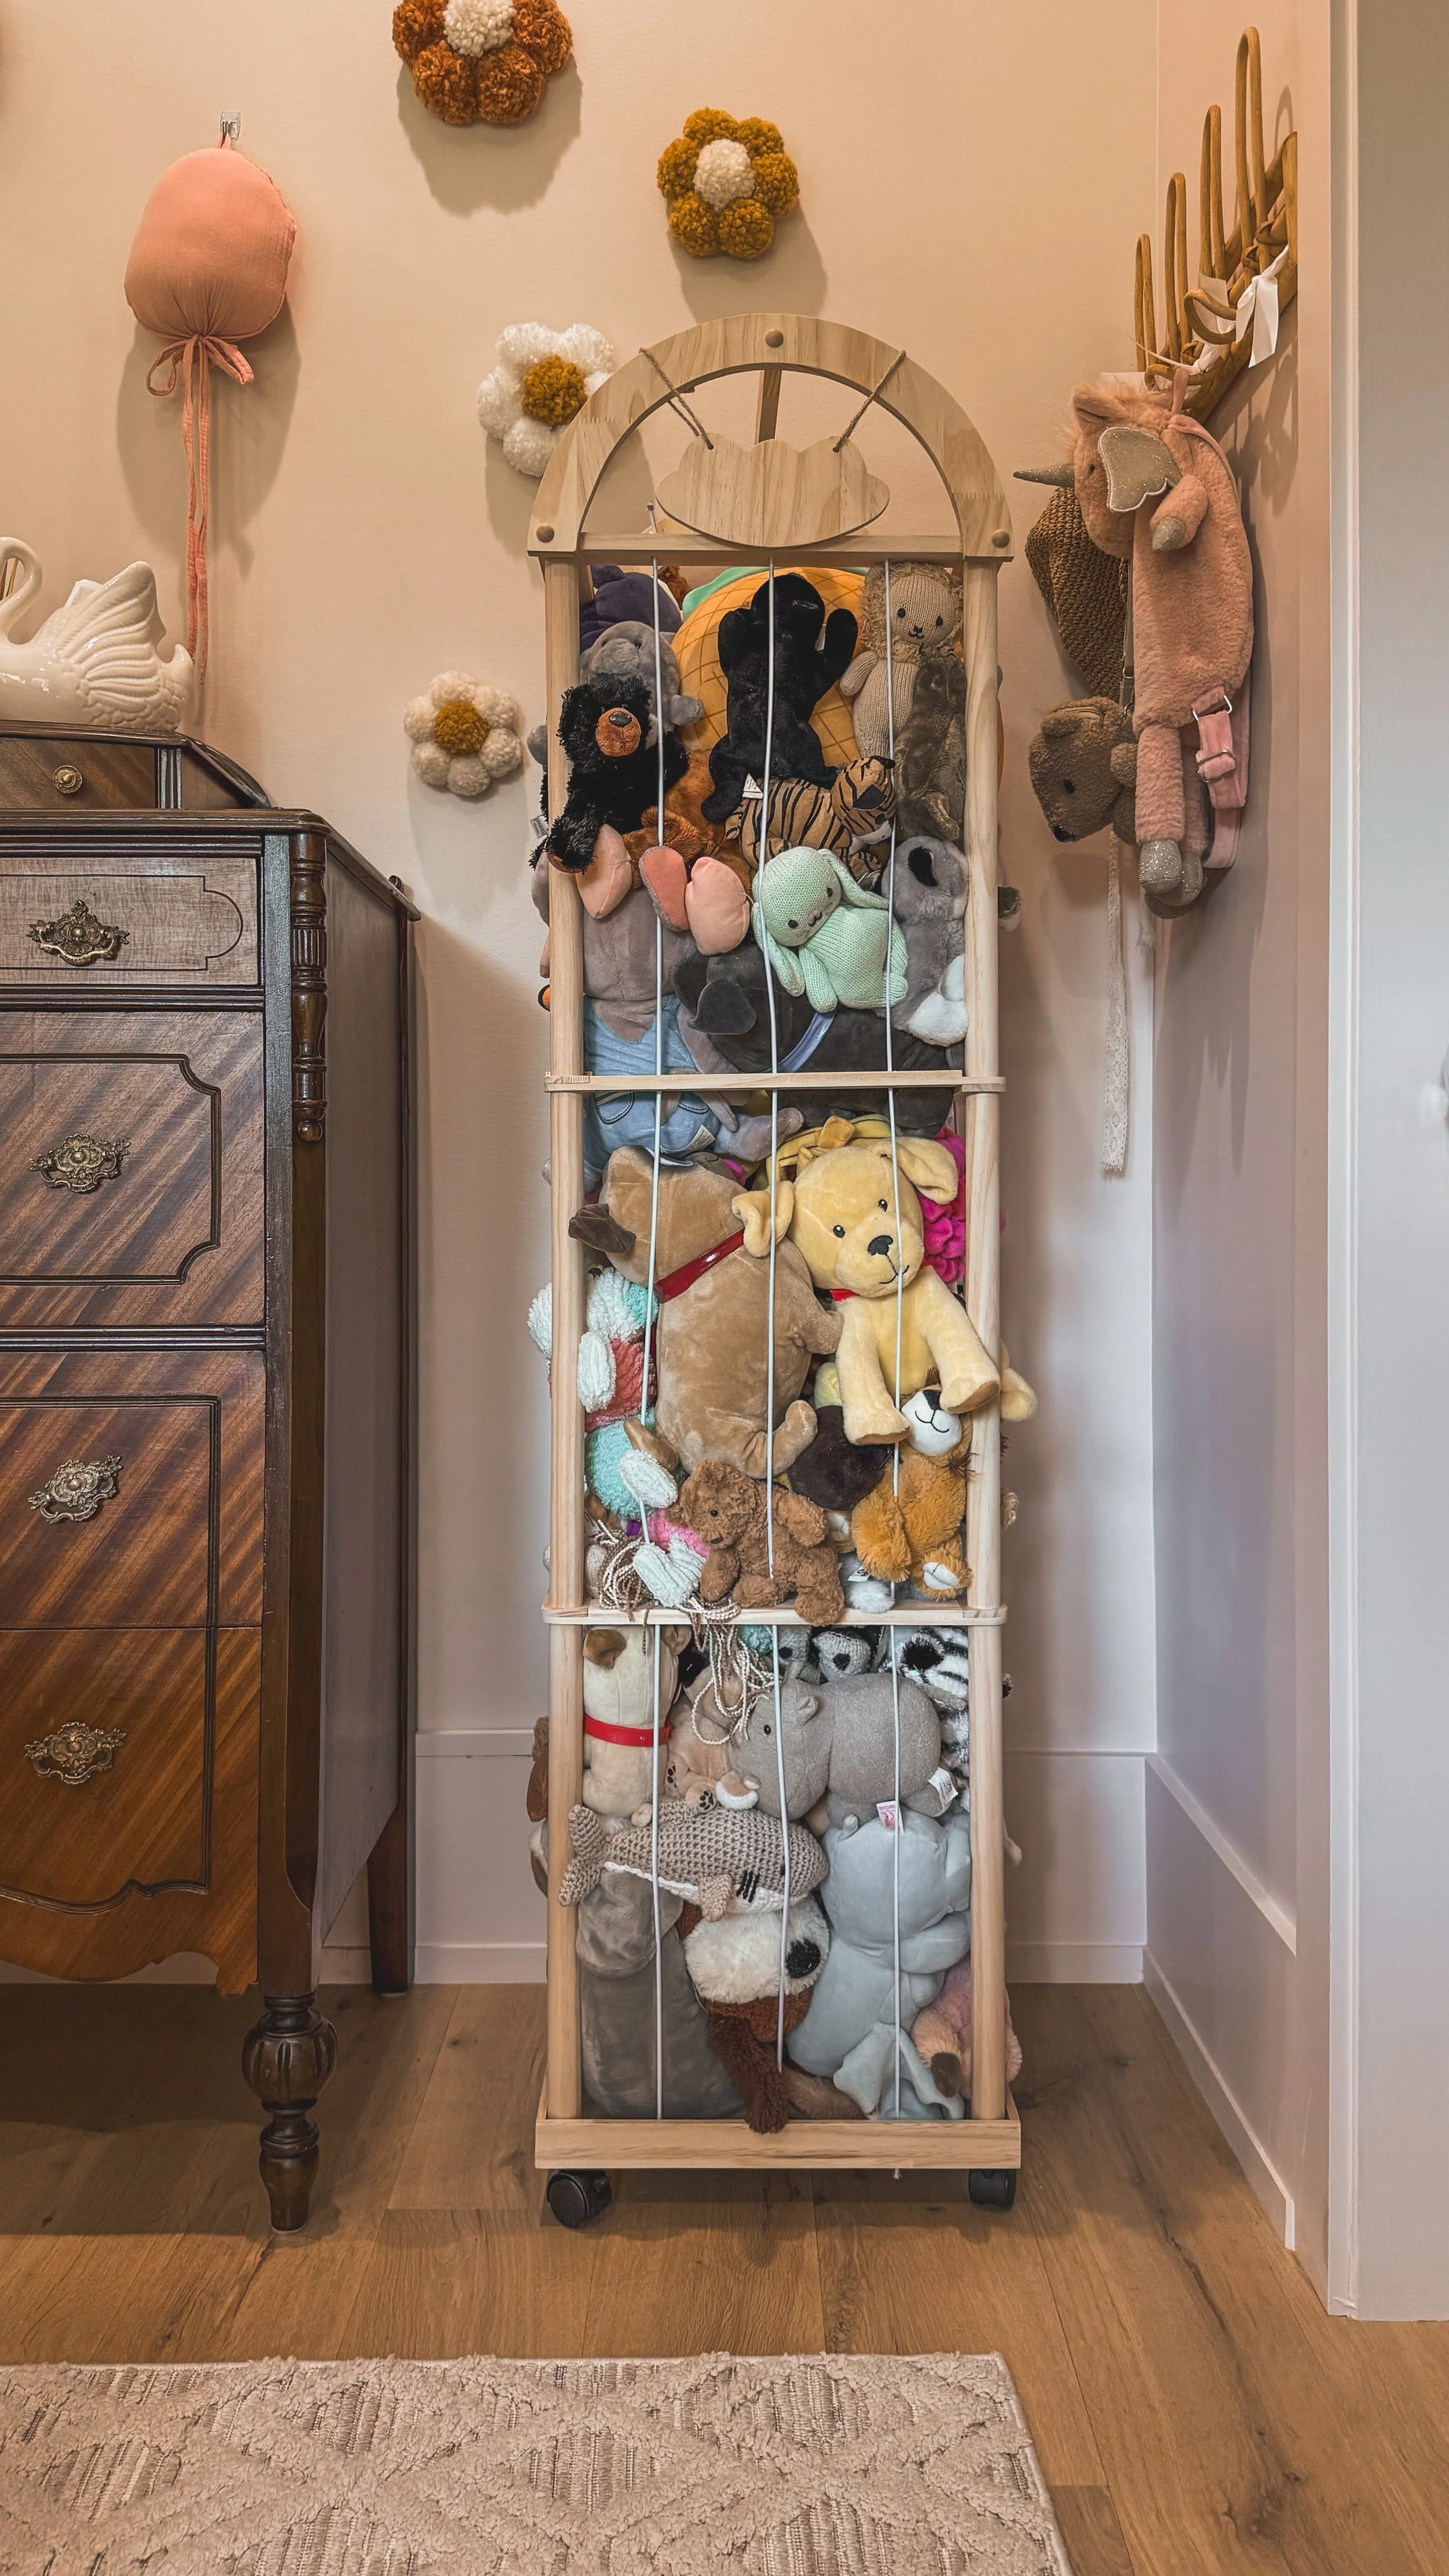
Then there’s the real star: the stuffed animal jail. Okay, it’s technically a stuffed animal organizer, but one look and you’ll see why we call it that. It corrals all the plush chaos into one tidy, vertical tower. It’s cute, on wheels, and somehow fits way more than I expected. It’s functional and fun, which is basically the dream when you’re organizing a kid’s room.
If you’re working with a small space (or just tired of stepping on random toys), these two are worth a look. They’ve helped keep things tidy while still giving her room to play, and I’m honestly a little obsessed.
Links At A Glance
Bed-Facebook Marketplace
Dresser-Antique Store
Rattan Shelf-Facebook Marketplace
IF YOU ENJOYED THIS POST, YOU MIGHT BE INTERESTED IN my Playroom Makeover!
FOLLOW ME ON MY SOCIALS!
Using Wallpaper To Hide Your Light Switch Covers

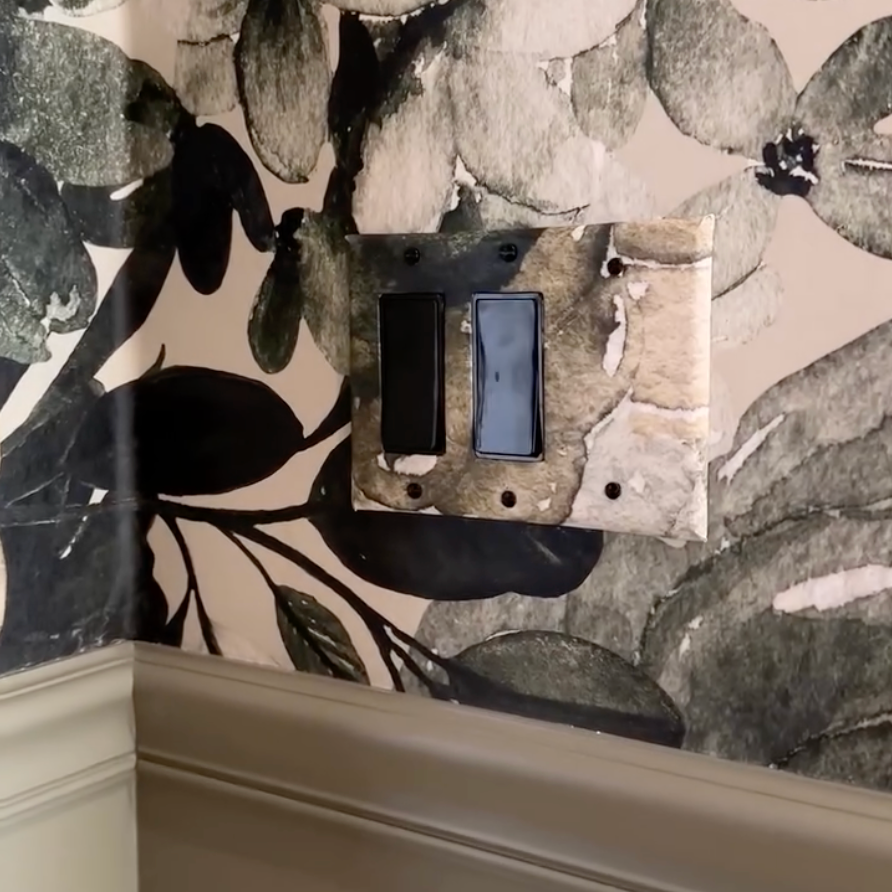
Okay, this might be one of my favorite little DIYs I’ve done. In my office, I’ve got this gorgeous wallpaper going on, but the light switch cover was totally killing the vibe. It wasn’t cute or special, and it stuck out so much against the pattern.
So I covered it with leftover wallpaper. And now? It basically disappears into the wall, and I love it.
What You’ll Need:
Light switch cover
How to Do It:
Remove the light switch cover from the wall using a screwdriver.
Spray paint the screws if you want them to match the wallpaper better. Just do a quick coat and let them dry while you work on the rest.


3. Cut out a piece of wallpaper that’s a little larger than the switch plate.
4. Spray a very light layer of adhesive on the front of the cover.
5. Lay the cover onto the wallpaper, pressing it down gently but firmly.
6. Cut slits at the corners of the wallpaper so it can wrap neatly around the edges.
7. Fold the excess paper around to the back, smoothing it down as you go.
8. Snip away any extra flaps or overlapping corners so everything lays flat.


9. Use your knife to cut an “X” shape through the wallpaper over the actual light switch openings, and then fold those little flaps to the back too. You might need some extra adhesive to help them stick down.
10. Poke holes for the screws with the tip of your knife or scissors.
11. Screw it back onto the wall using your (now matching!) screws.

